Build your first InstantIoT project in 10 minutes — a button on your phone that turns on an LED on your ESP board.
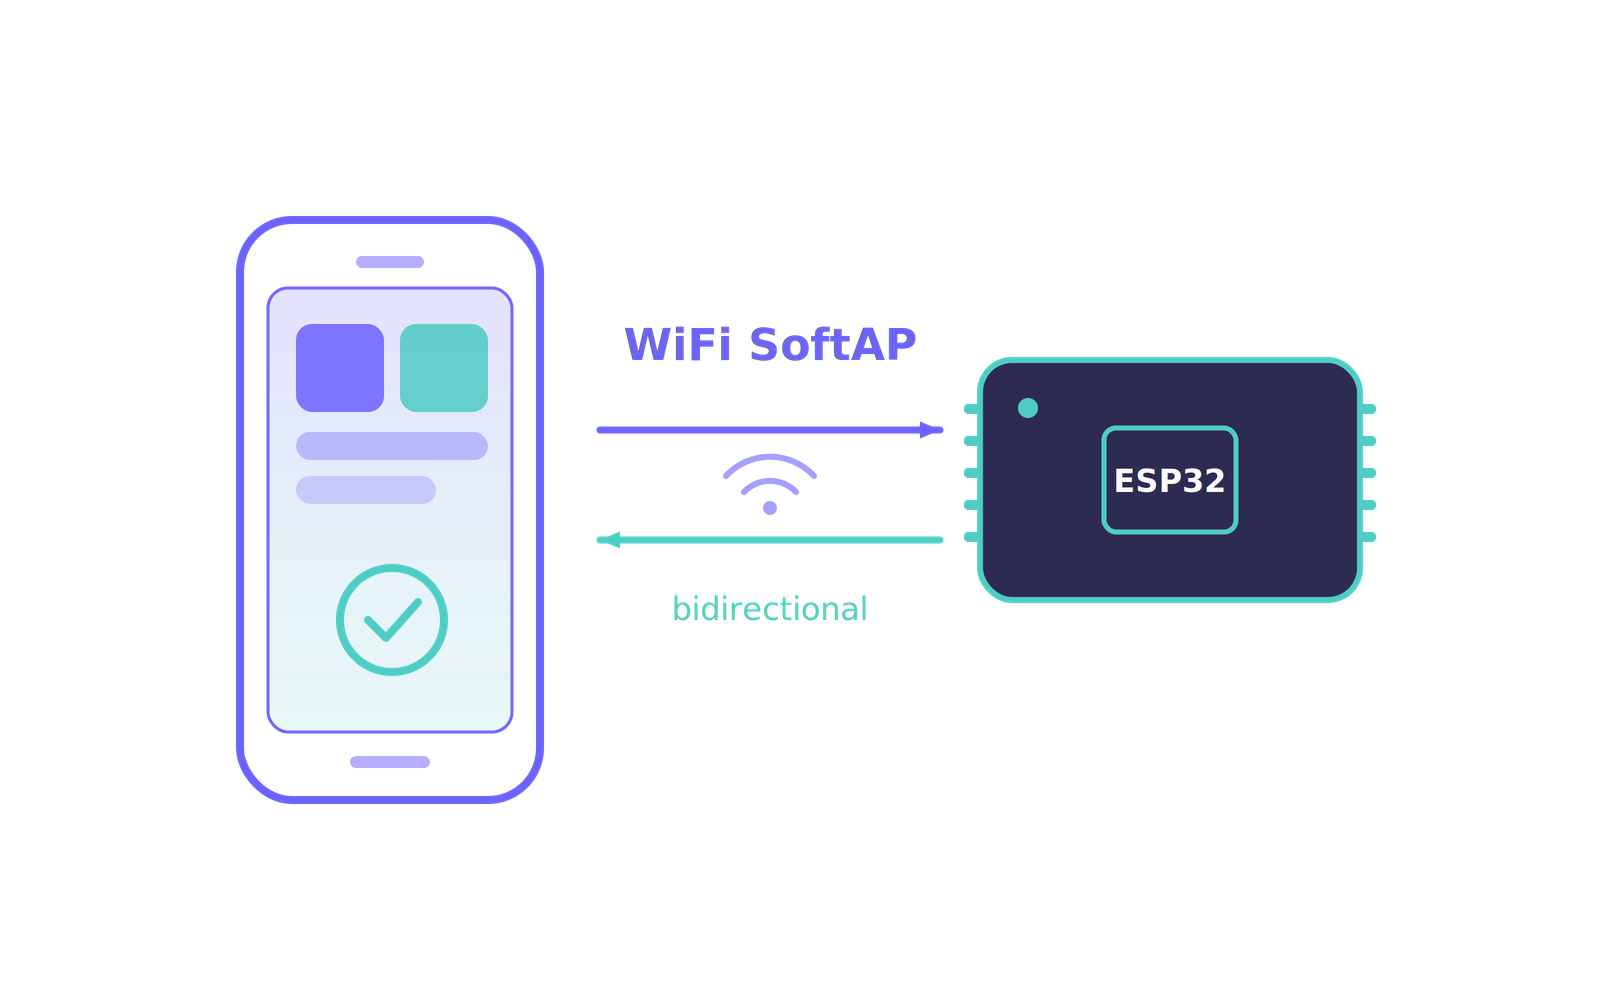
We use Direct Mode for this guide because it has zero infrastructure overhead. Once you’ve done this, you’ll have a feel for how InstantIoT works, and you can move to Server Mode whenever your project grows.
What you need
- An ESP32 or ESP8266 board, any variant.
- A USB cable.
- The Arduino IDE installed (1.8 or 2.x).
- The InstantIoT app on Android.
1. Install the InstantIoT library – Arduino
Open the Arduino IDE → Tools → Manage Libraries → search InstantIoT → click Install.
2. Create a new project in the app
Open the InstantIoT app. Tap Maker at the bottom (Direct Mode), then New project. Name it — for example, First Project. And You land on an empty dashboard in edit mode.
3. Add a Simple Button
Tap the + in the toolbar → pick Simple Button in the widget catalog. The button appears on the canvas.
Tap the button to open its settings. Set the Widget ID to: btn1
That ID is the bridge between the app and your sketch. We’ll see it in the generated arduino code in next step.
4. Generate the Arduino code
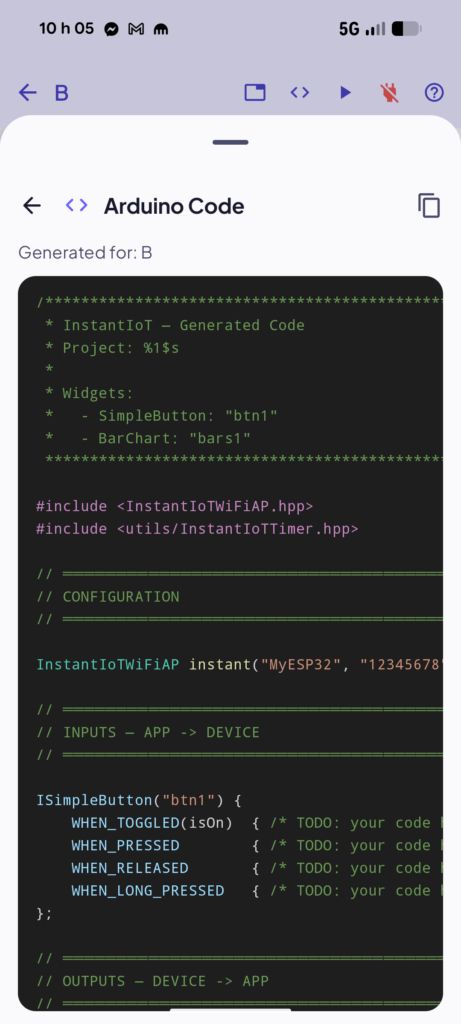
In the toolbar, tap the code icon. The Arduino Code sheet opens with a complete sketch ready to copy and add your logic.
The app generates the structure for you. The widget block, the connection setup, the loop — everything that connects your hardware to InstantIoT.
What’s left for you: the logic. We’ll add it in the next step.
Tap Copy code.
#include <InstantIoTWiFiAP.hpp>

InstantIoTWiFiAP instant("InstantIoT", "12345678");

ISimpleButton("btn1") {
  WHEN_PRESSED {
    // your code here
  }
  WHEN_RELEASED {
    // your code here
  }
}

void setup() {
  Serial.begin(115200);
  instant.begin();
}

void loop() {
  instant.loop();
}
5. Add your logic (change LED state attached on pin LED_BUILTIN )
Open the Arduino IDE → File → New sketch. Paste the code.
Now add what should happen when the button is pressed and released — in this case, turn an LED on and off.
Three lines added, all inside the parts the app left for you. The generated structure stays untouched.
#include <InstantIoTWiFiAP.hpp>

InstantIoTWiFiAP instant("FirstProject", "12345678");

ISimpleButton("btn1") {
  WHEN_PRESSED {
    digitalWrite(LED_BUILTIN, HIGH); //1
  }
  WHEN_RELEASED {
    digitalWrite(LED_BUILTIN, LOW); //2
  }
}

void setup() {
  Serial.begin(115200);
  pinMode(LED_BUILTIN, OUTPUT); //3
  instant.begin();
}

void loop() {
  instant.loop();
}
6. Flash your board
In the Arduino IDE:
Pick your board in Tools → Board.
Plug your ESP in, pick the right port in Tools → Port.
Click Upload.
When upload finishes, your board boots and broadcasts a Wi-Fi network called FirstProject with password 12345678.
7. Connect the app to your board
In the app, tap the connection icon at the top right of the dashboard → Scan Wi-Fi Devices → tap FirstProject → enter the password 12345678 → Connect.
8. Press the button — watch the LED
Switch the dashboard to Run mode (the toggle in the toolbar). Press your Simple Button.
The LED on your board lights up. Release — it goes off.
Successs
You just built your first end-to-end InstantIoT project.
Where to go next
You now have all the pieces:
- A widget on the phone.
- A widget ID that links it to your sketch.
- A library that handles the connection.
- A code block that runs your logic.
From here: