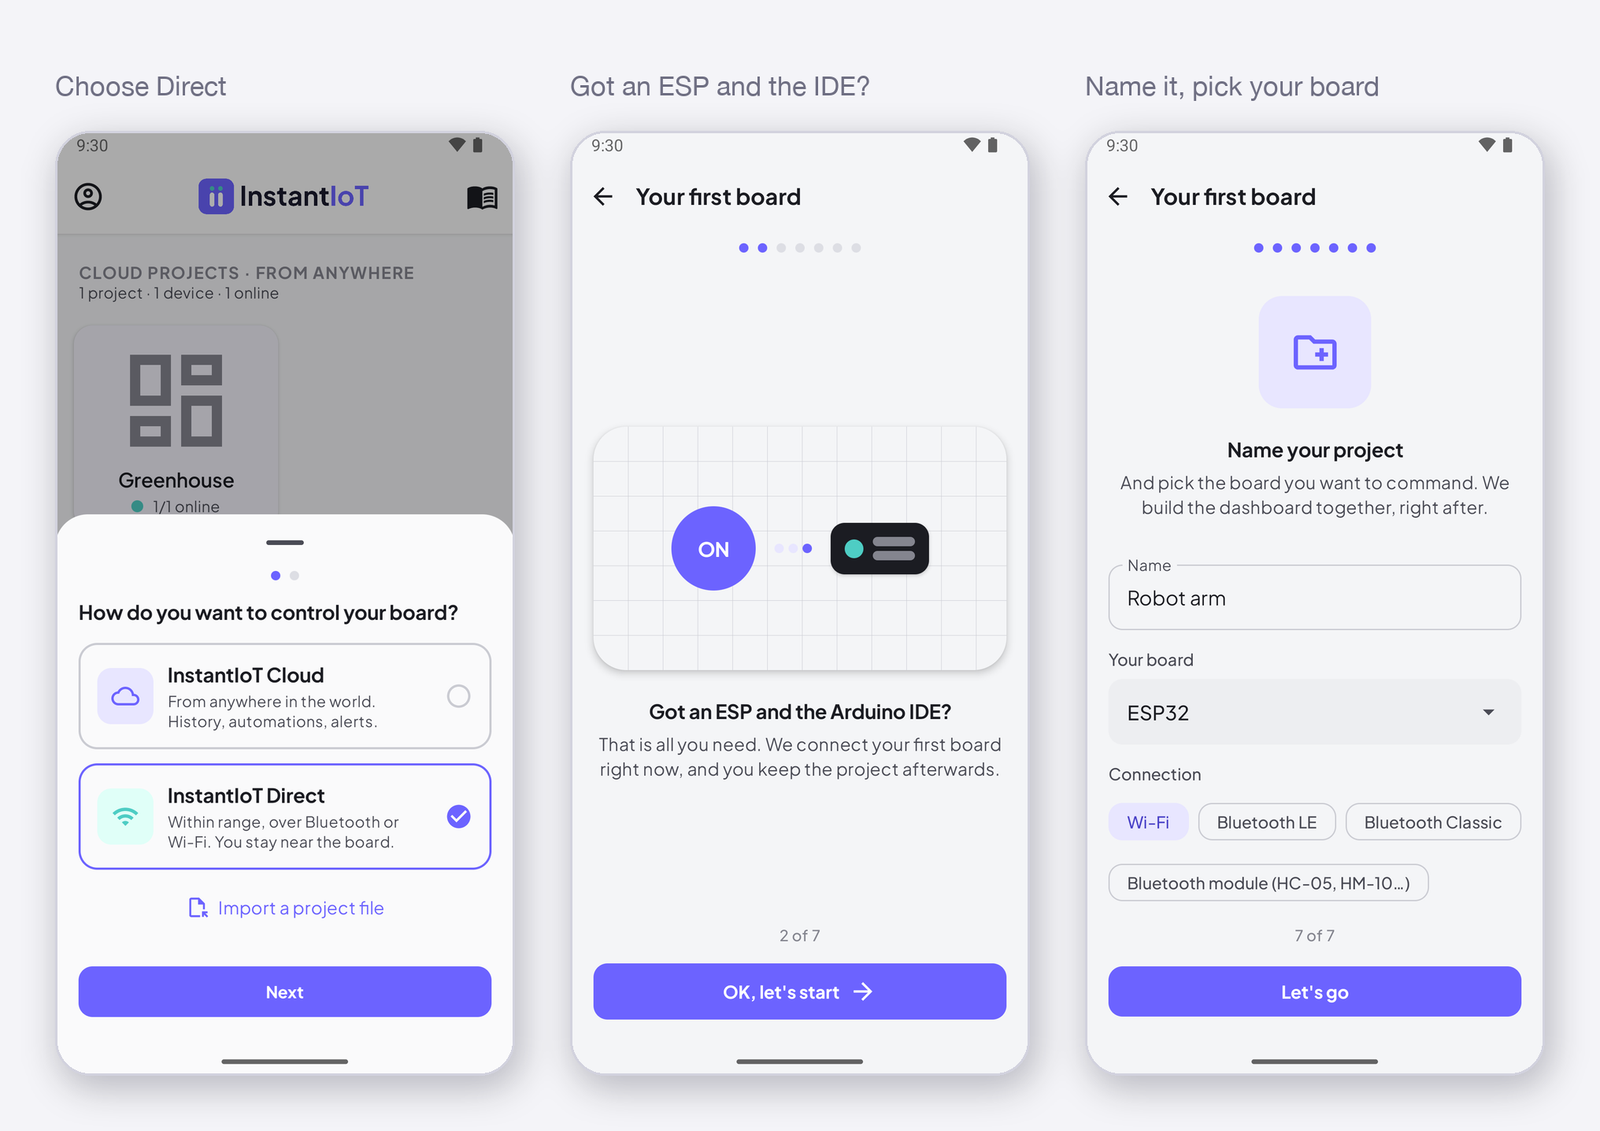
A device and your phone: a button on your phone turns on the LED of your ESP32. That is the whole of InstantIoT in one project — a widget, a signal, a sketch the app writes for you — and every project after this one is the same four moves.
What you need
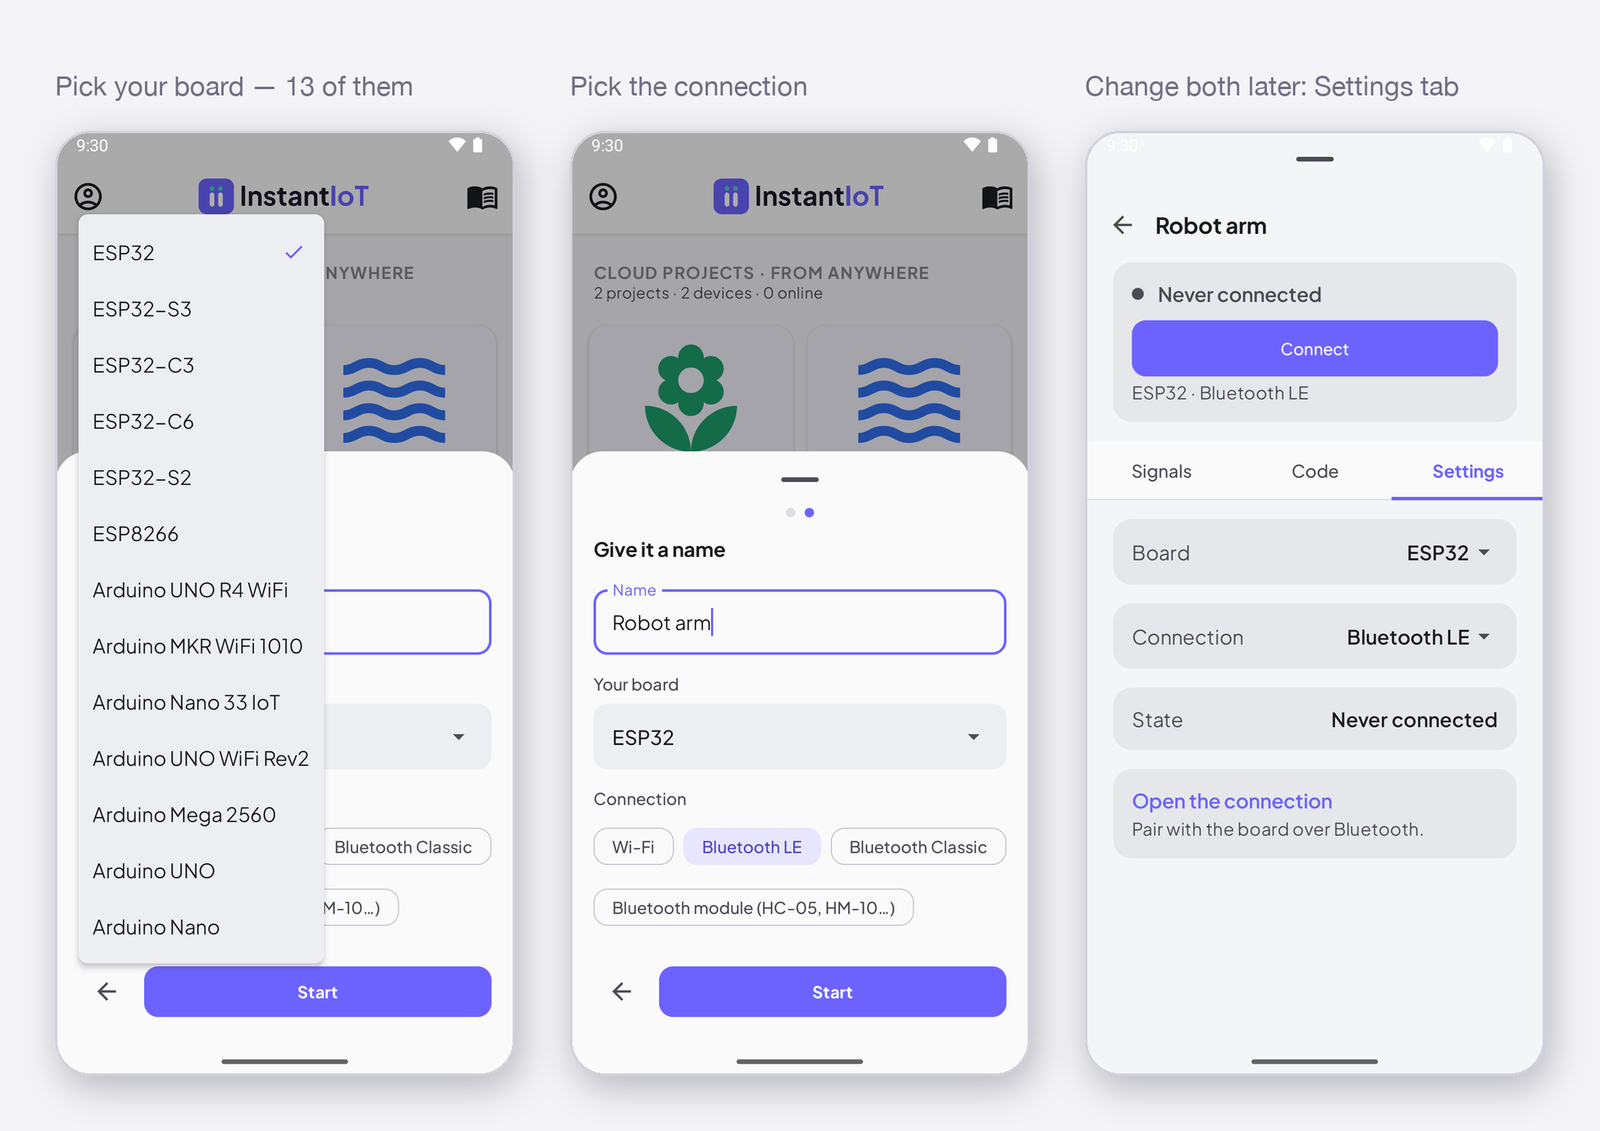
- An ESP32, an ESP8266 or an Arduino UNO R4 WiFi — any variant.
- A USB cable.
- The Arduino IDE (2.x) on your computer.
- The InstantIoT app on your phone — Download the app.
The four moves
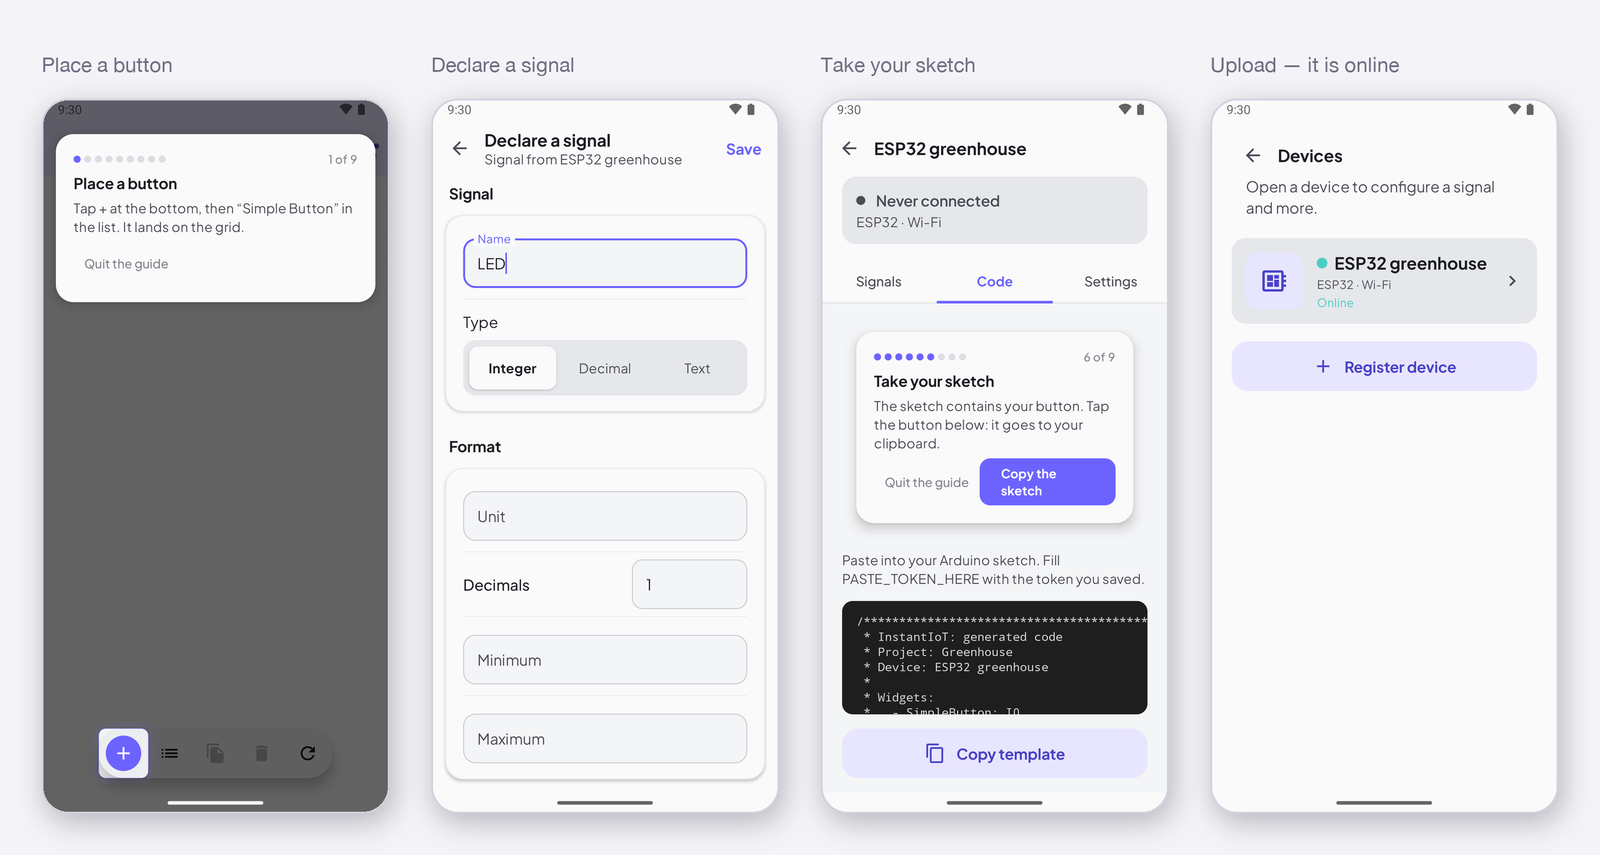
The app guides you through them, step by step, with a counter at the top of the screen. Whatever path you pick below, this is what you will do:
- Place a button on the dashboard — tap +, pick Simple Button.
- Declare a signal on your device — a name, a type — and wire the button to it. The signal has an address,
I0, and that address is the only thing the device will know. - Take your sketch — the app writes it, with the button’s block already in it. Copy, paste into the Arduino IDE, add one line:
digitalWrite(LED_BUILTIN, on). - Upload and connect — the device comes online, you switch the dashboard to Run, you press the button. The LED lights.
The sketch, at the end
This is what you will have in the Arduino IDE after the four moves — the app writes everything but the two digitalWrite lines and the pinMode. The two paths differ by the begin() line only.
Cloud
#include <InstantIoT.h>

const char* WIFI_SSID    = "MyWiFi";
const char* WIFI_PASS    = "MyPassword";
const char* DEVICE_TOKEN = "PASTE_TOKEN_HERE";   // app → device → Copy token

const int LED = 2;                                // the ESP32 built-in LED (LED_BUILTIN on most boards)

ISimpleButton(I0) {                               // the button at I0
    WHEN_PRESSED  { digitalWrite(LED, HIGH); }
    WHEN_RELEASED { digitalWrite(LED, LOW);  }
};

void setup() {
    Serial.begin(115200);
    pinMode(LED, OUTPUT);
    InstantIoT.begin(WiFiLink(WIFI_SSID, WIFI_PASS), Cloud(DEVICE_TOKEN));
}

void loop() {
    InstantIoT.loop();
}
Direct
#include <InstantIoT.h>

const char* AP_SSID     = "MyESP32";              // the network the device opens
const char* AP_PASSWORD = "12345678";             // 8 characters or more

const int LED = 2;                                // the ESP32 built-in LED (LED_BUILTIN on most boards)

ISimpleButton(I0) {                               // the button at I0
    WHEN_PRESSED  { digitalWrite(LED, HIGH); }
    WHEN_RELEASED { digitalWrite(LED, LOW);  }
};

void setup() {
    Serial.begin(115200);
    pinMode(LED, OUTPUT);
    InstantIoT.begin(AccessPoint(AP_SSID, AP_PASSWORD));
}

void loop() {
    InstantIoT.loop();
}
Pick your path
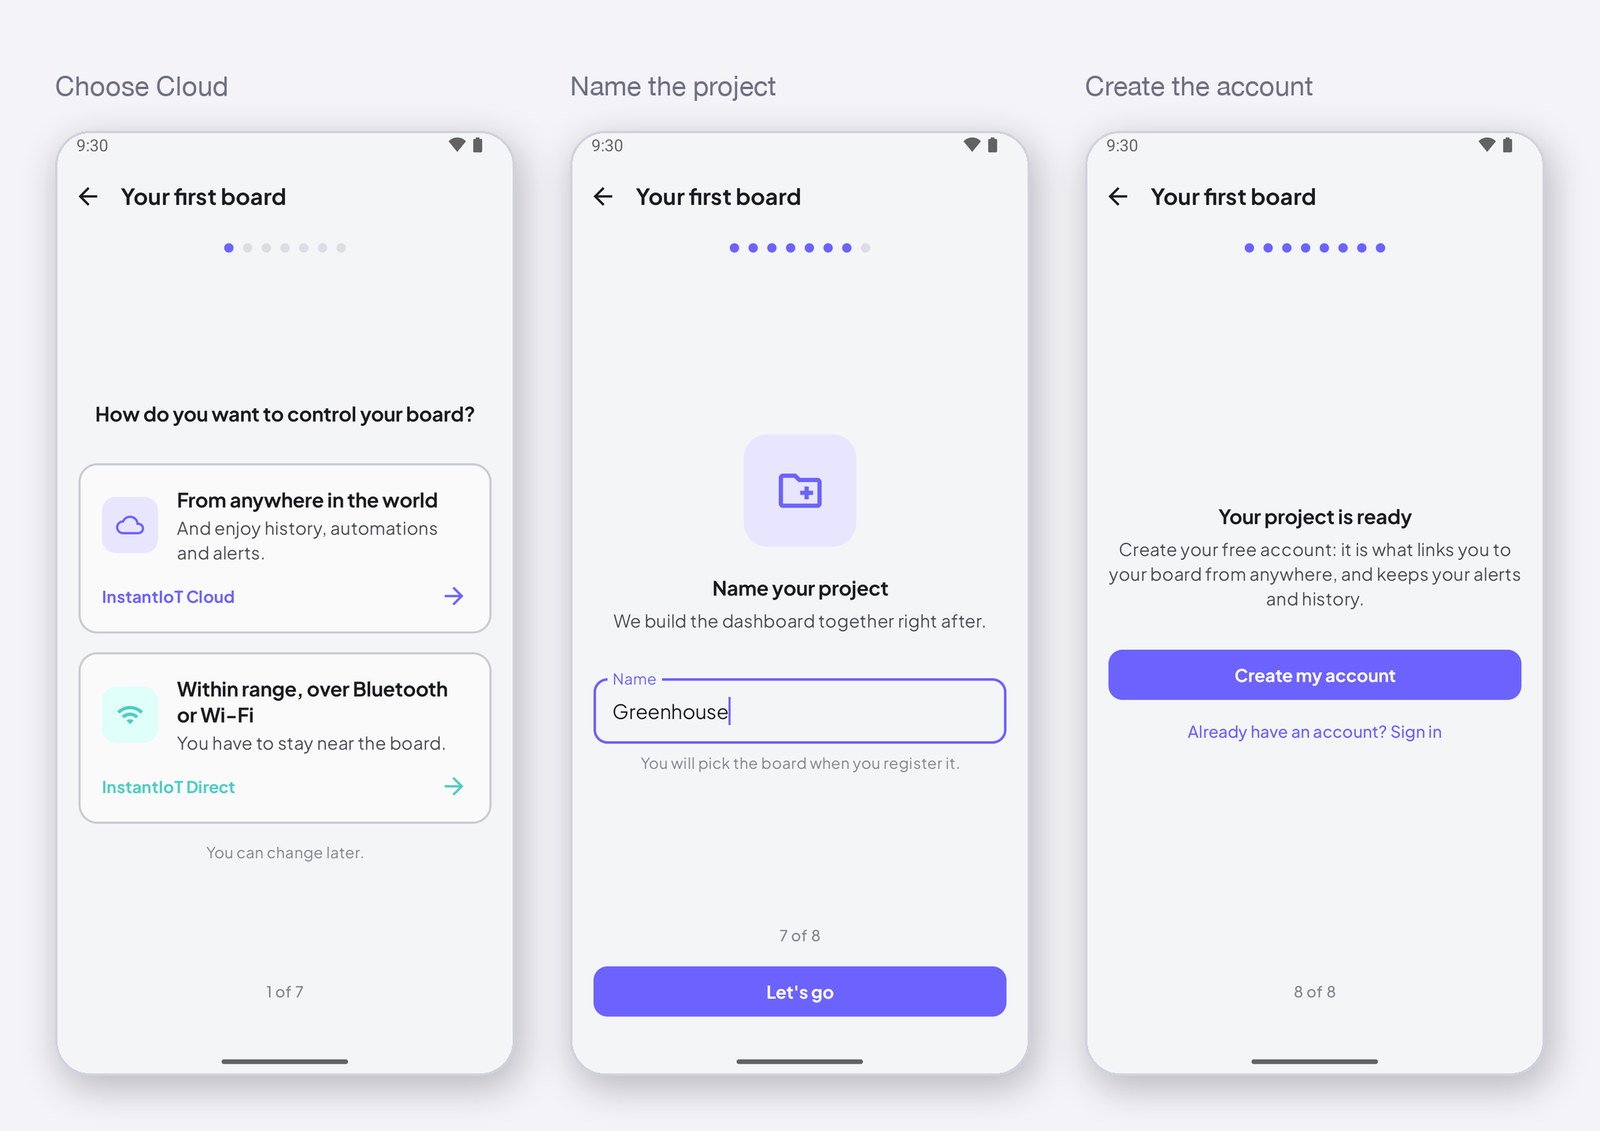
Two ways to reach the device, same app, same sketch — only the connection line differs (Cloud or Direct).
Cloud — from anywhere. Your device talks to InstantIoT Cloud over your Wi-Fi, the app reaches it from anywhere; you get the history, the automations and the notifications. A free account, and the device’s token in the sketch. This is the path for a project that stays. → Quickstart Cloud, step by step
Direct — Bluetooth or Wi-Fi. Your phone joins the Wi-Fi network the device opens itself, or pairs over Bluetooth. Nothing to create, nothing in between: the fastest first contact. When the project grows, move it to Cloud — the widgets and the sketch come along. → Quickstart Direct, step by step
Not sure? Ask where you will be when you look at it. Next to the device — Direct. Anywhere else, or with a history, rules and notifications — Cloud. Neither is longer than the other: one line of the sketch differs, and a project moves from one to the other whenever you like.
After the button
You now have every piece: a widget on the phone, a signal with its address, a library that carries the connection, a block in the sketch that runs your code. From here — Read a sensor value on your phone, Control your device from your phone, Get notified when a value crosses a threshold.