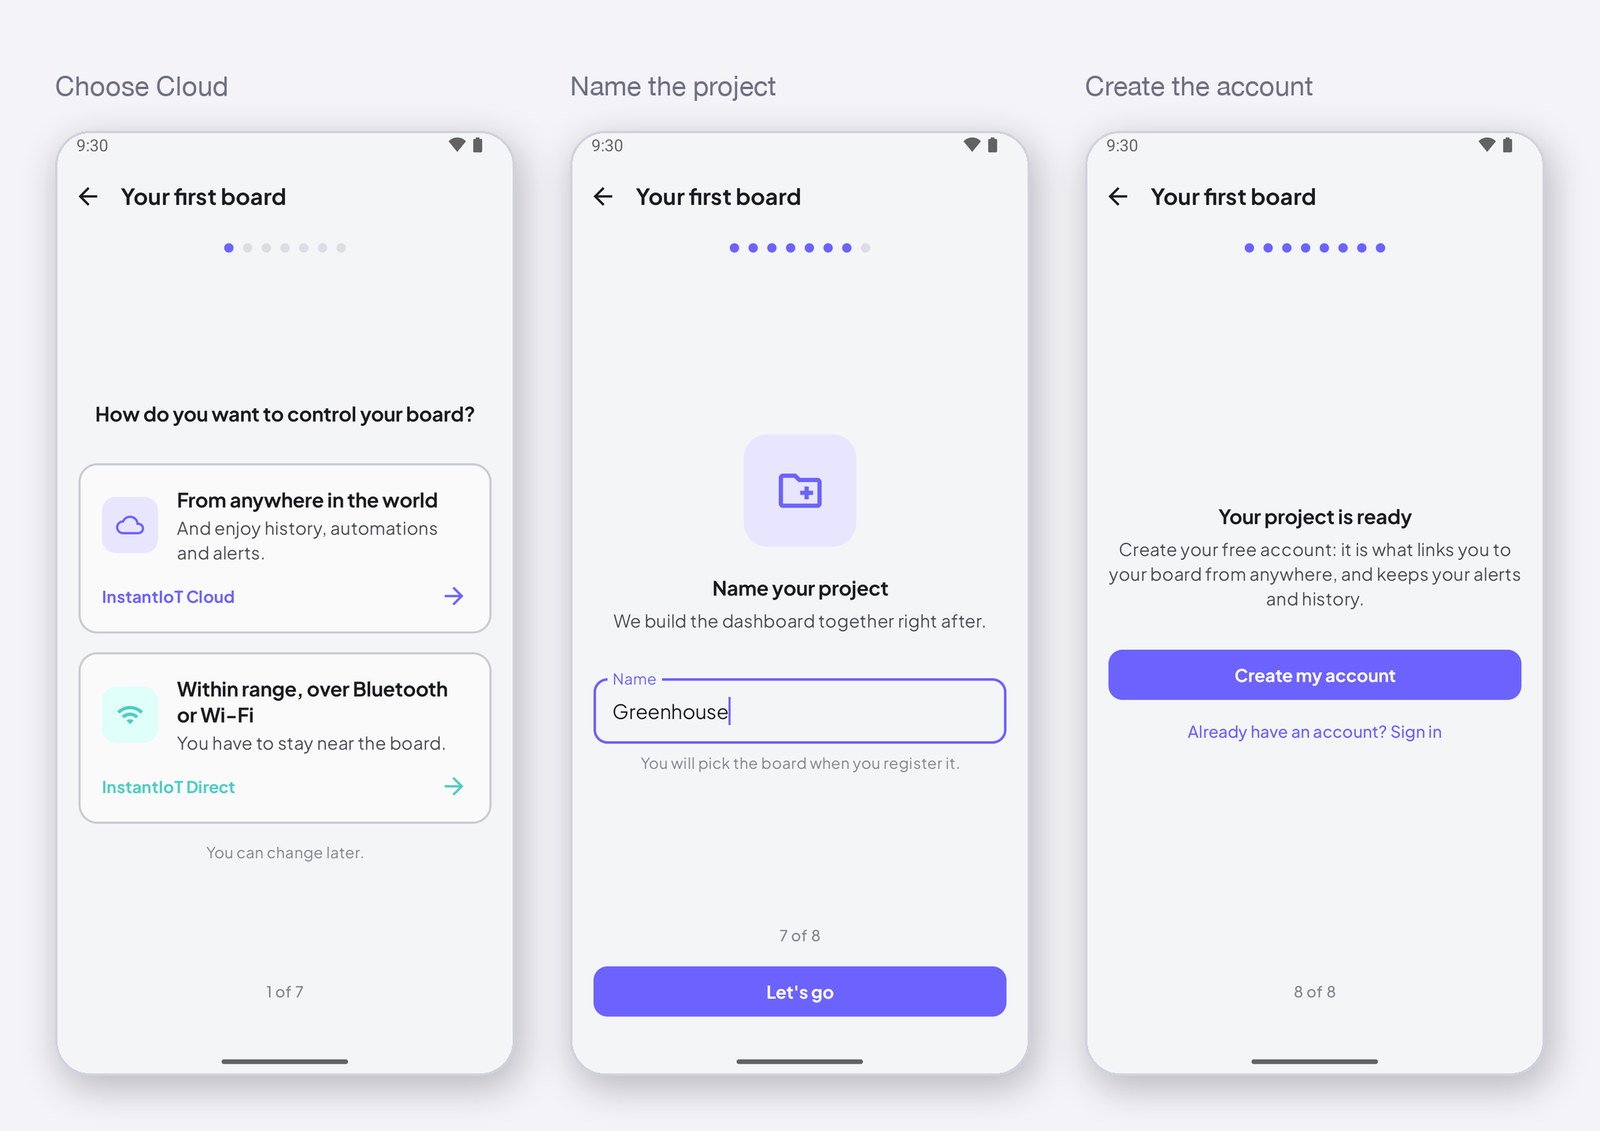
No account, no Internet, no server: your phone talks straight to the device, over the device’s own Wi-Fi or Bluetooth.
Same app, same widgets, same blocks in the sketch, and the same nine-step guide the first time — with two differences: there is no device to register and no token to keep, and at the end you connect the phone to the device.
Before you start. The app, one of the thirteen boards — an ESP32 does Wi-Fi and both Bluetooths, an ESP8266 or an UNO R4 WiFi does Wi-Fi, an UNO or a Mega needs a Bluetooth module — the Arduino IDE with the InstantIoT library (Install the library). And a device that can already run Blink. This guide goes over Wi-Fi; the Bluetooth roads are one setting away, at step 7.
Your first device
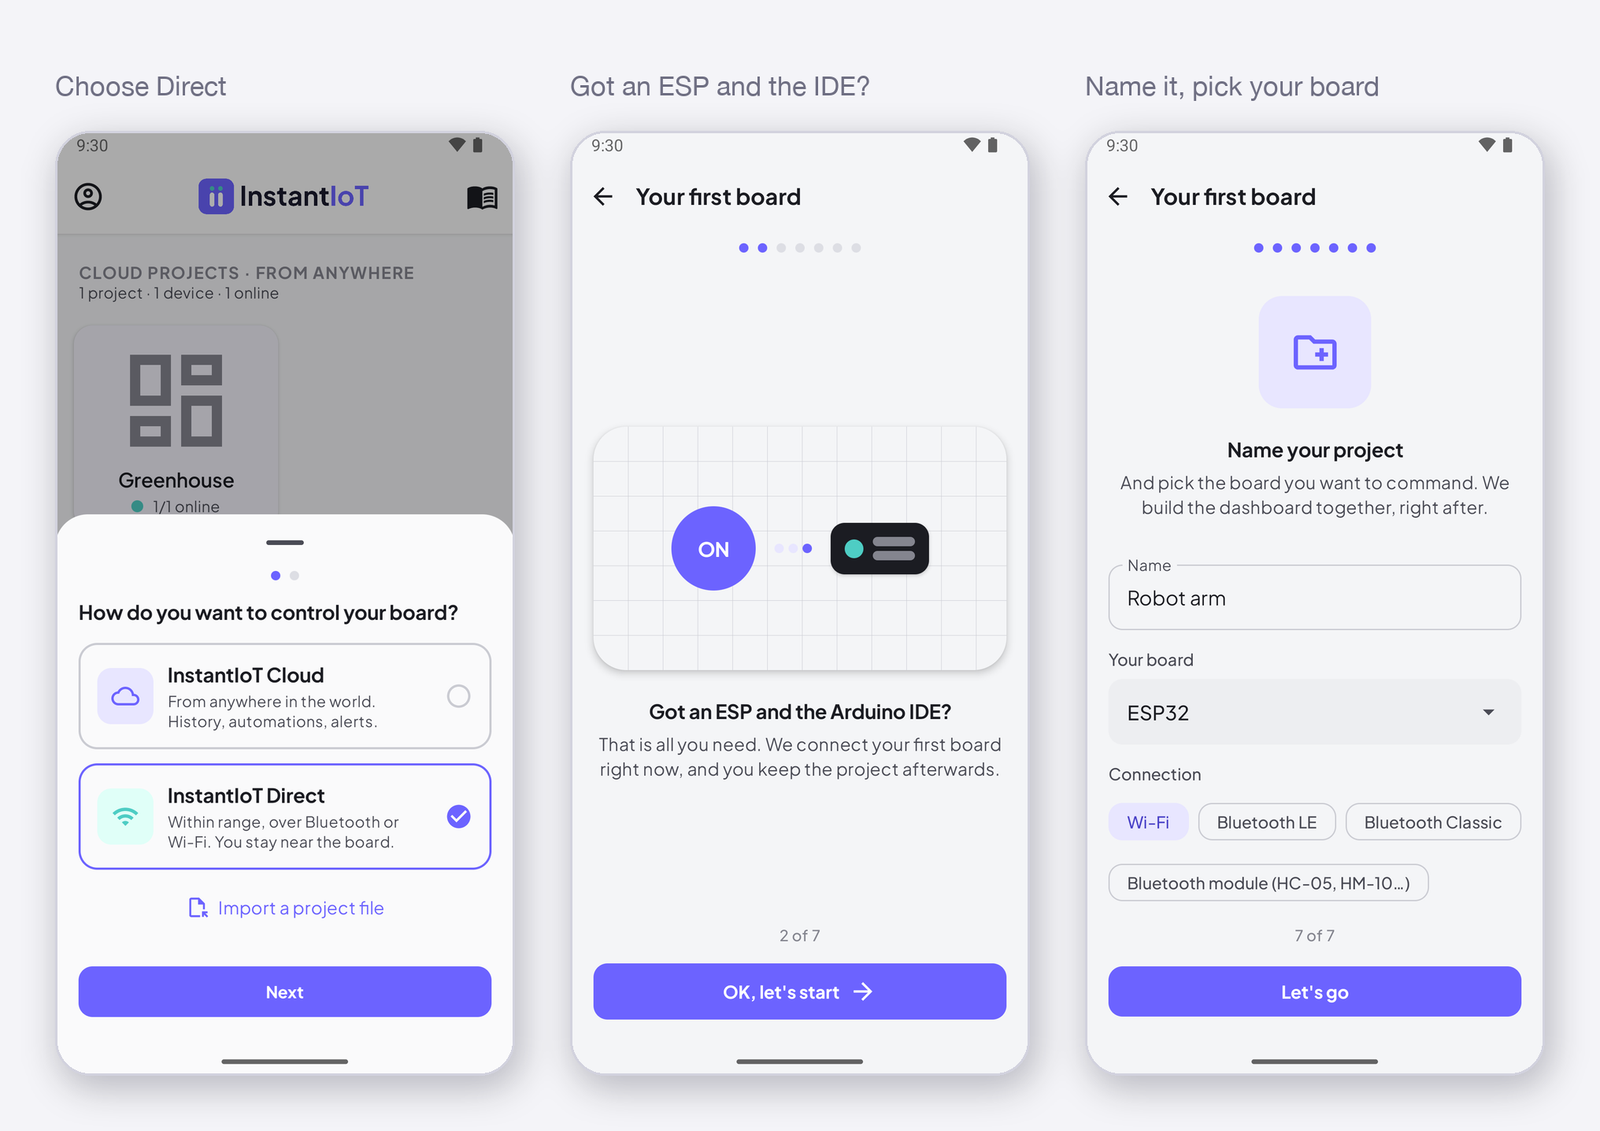
Connect your first device on the home screen, then Within range, over Bluetooth or Wi-Fi (InstantIoT Direct). Four short slides say what you are about to do — a button, a signal, the wire, the sketch — then you name the project and pick the device you have. Let’s go: the dashboard opens and the guide starts, over the device’s own Wi-Fi.
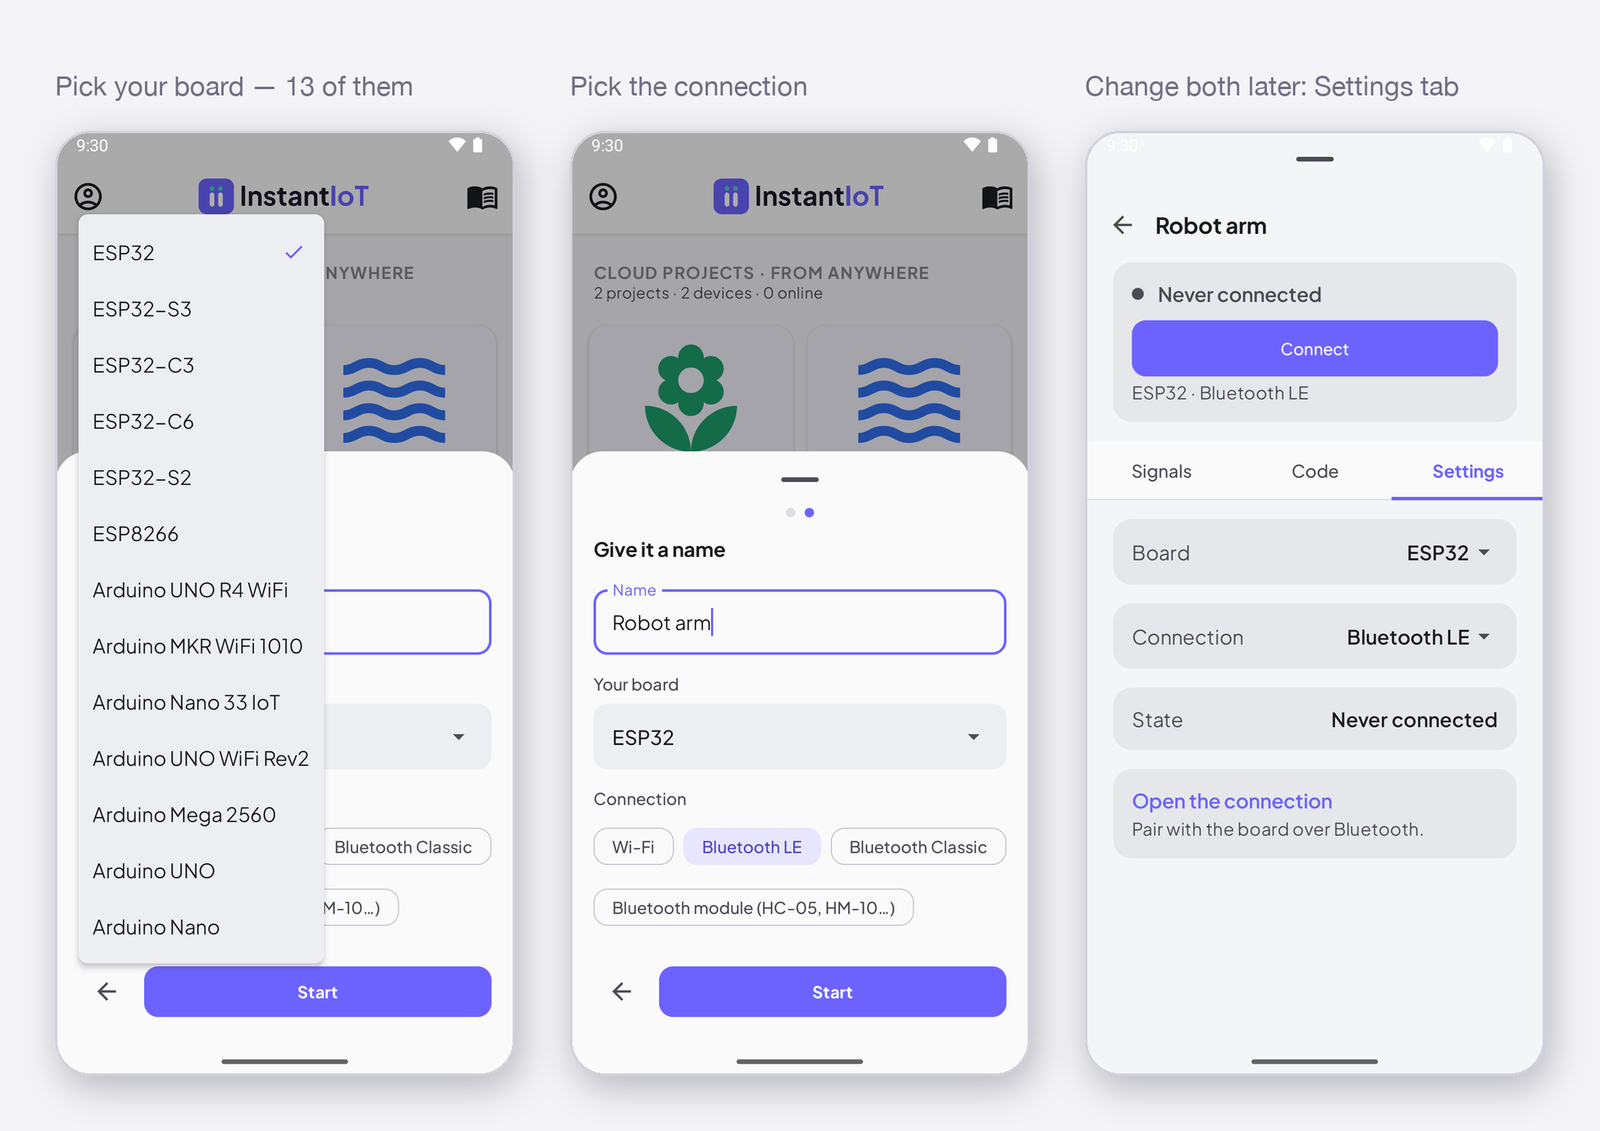
Creating the project with + on the home screen instead shows the same list of boards with, under it, the connections that board can do — Wi-Fi, Bluetooth LE, Bluetooth Classic, Bluetooth module — then opens the dashboard without the guide; the nine moves below are the same. Either way, both the board and the connection change later on the device sheet, Settings tab.
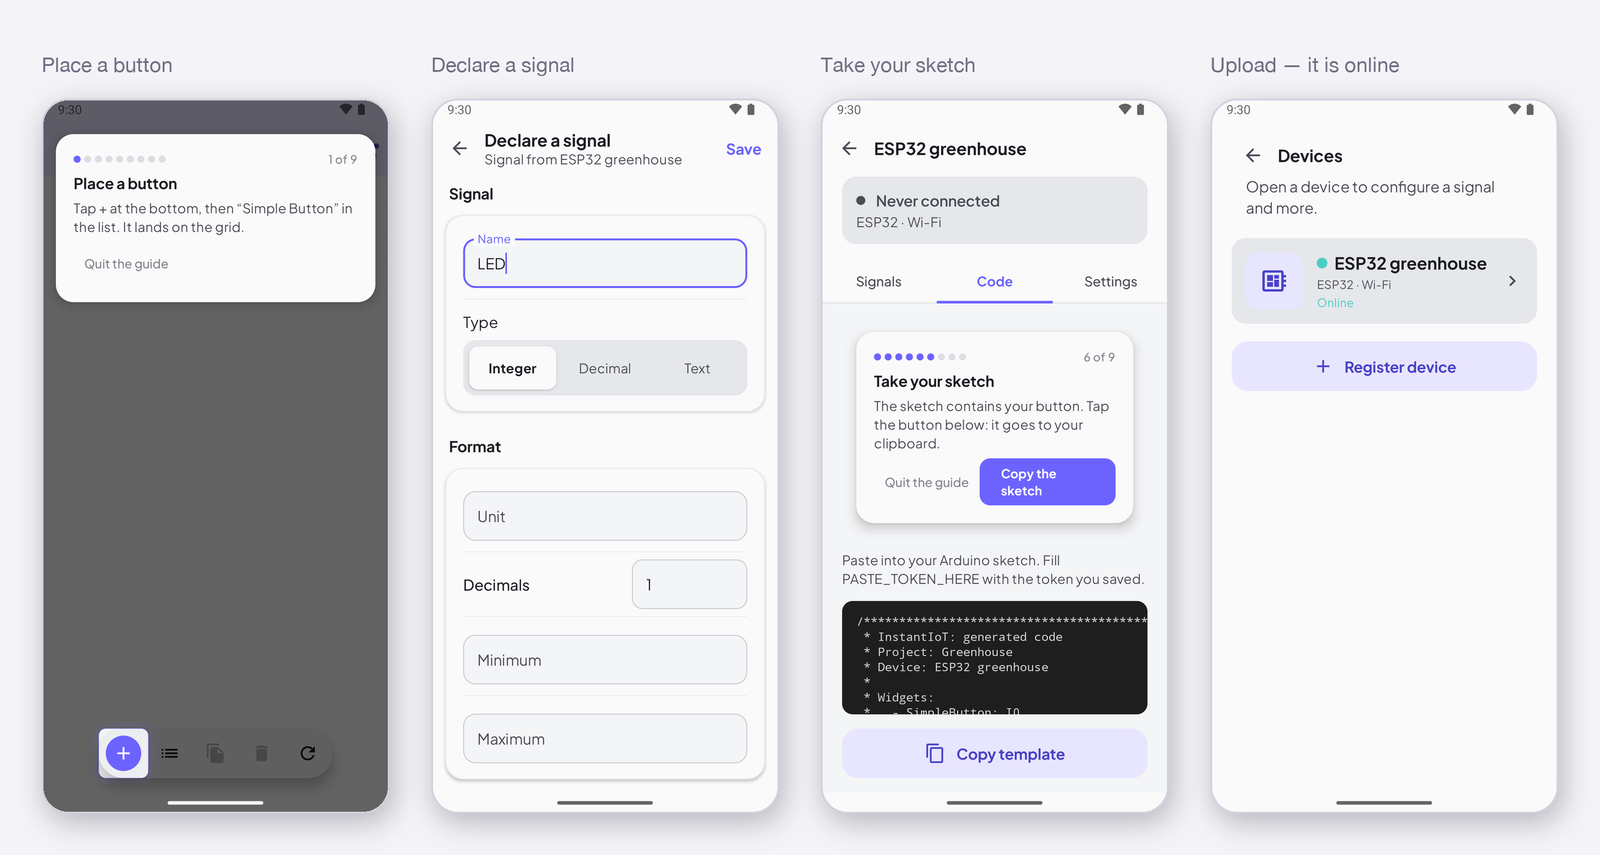
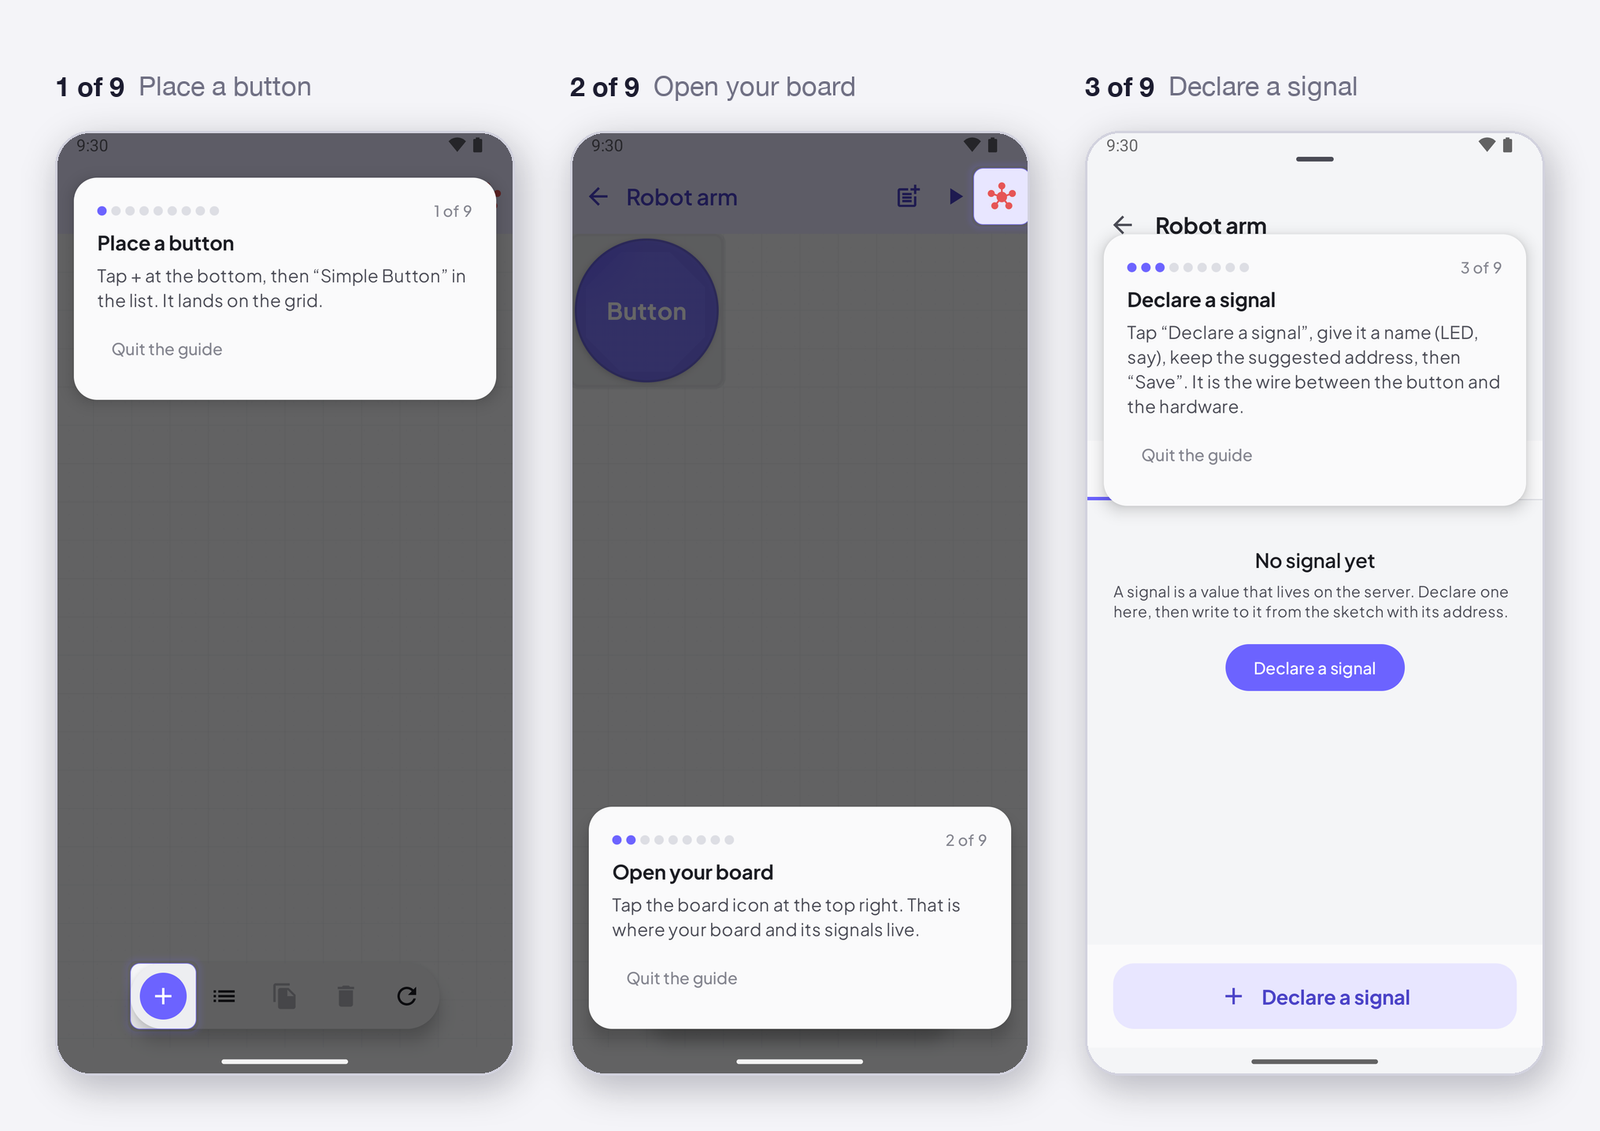
1 – 3 · Place a button, open your device, declare a signal
+ at the bottom, Simple Button. Then the device icon at the top right — red, the device is not connected yet: that is where your device and its signals live. Declare a signal: name it LED, Save. The app gives it I0 — the name the sketch will use:
ISimpleButton(I0) { ... }; // I0: the address the app just gave your signal
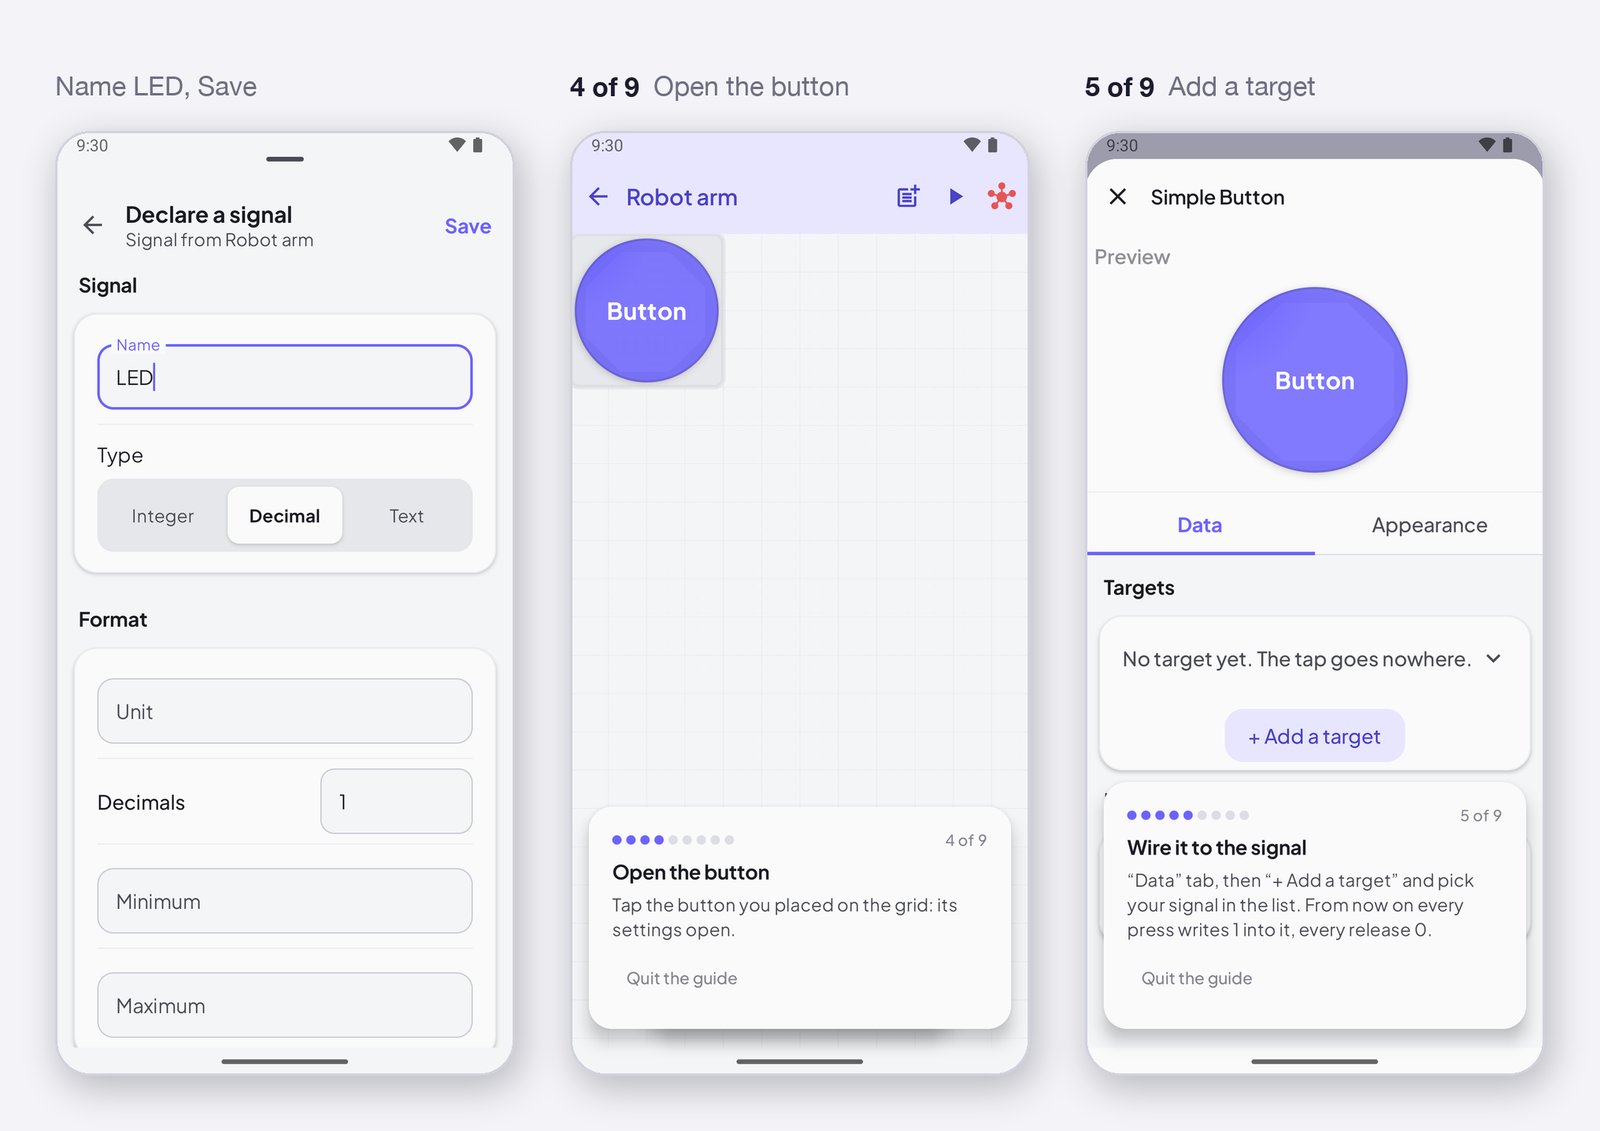
4 – 5 · Open the button, wire it to the signal
Back to the dashboard, tap the button: its settings open. Data tab, + Add a target, pick LED. Every press writes 1, every release 0.
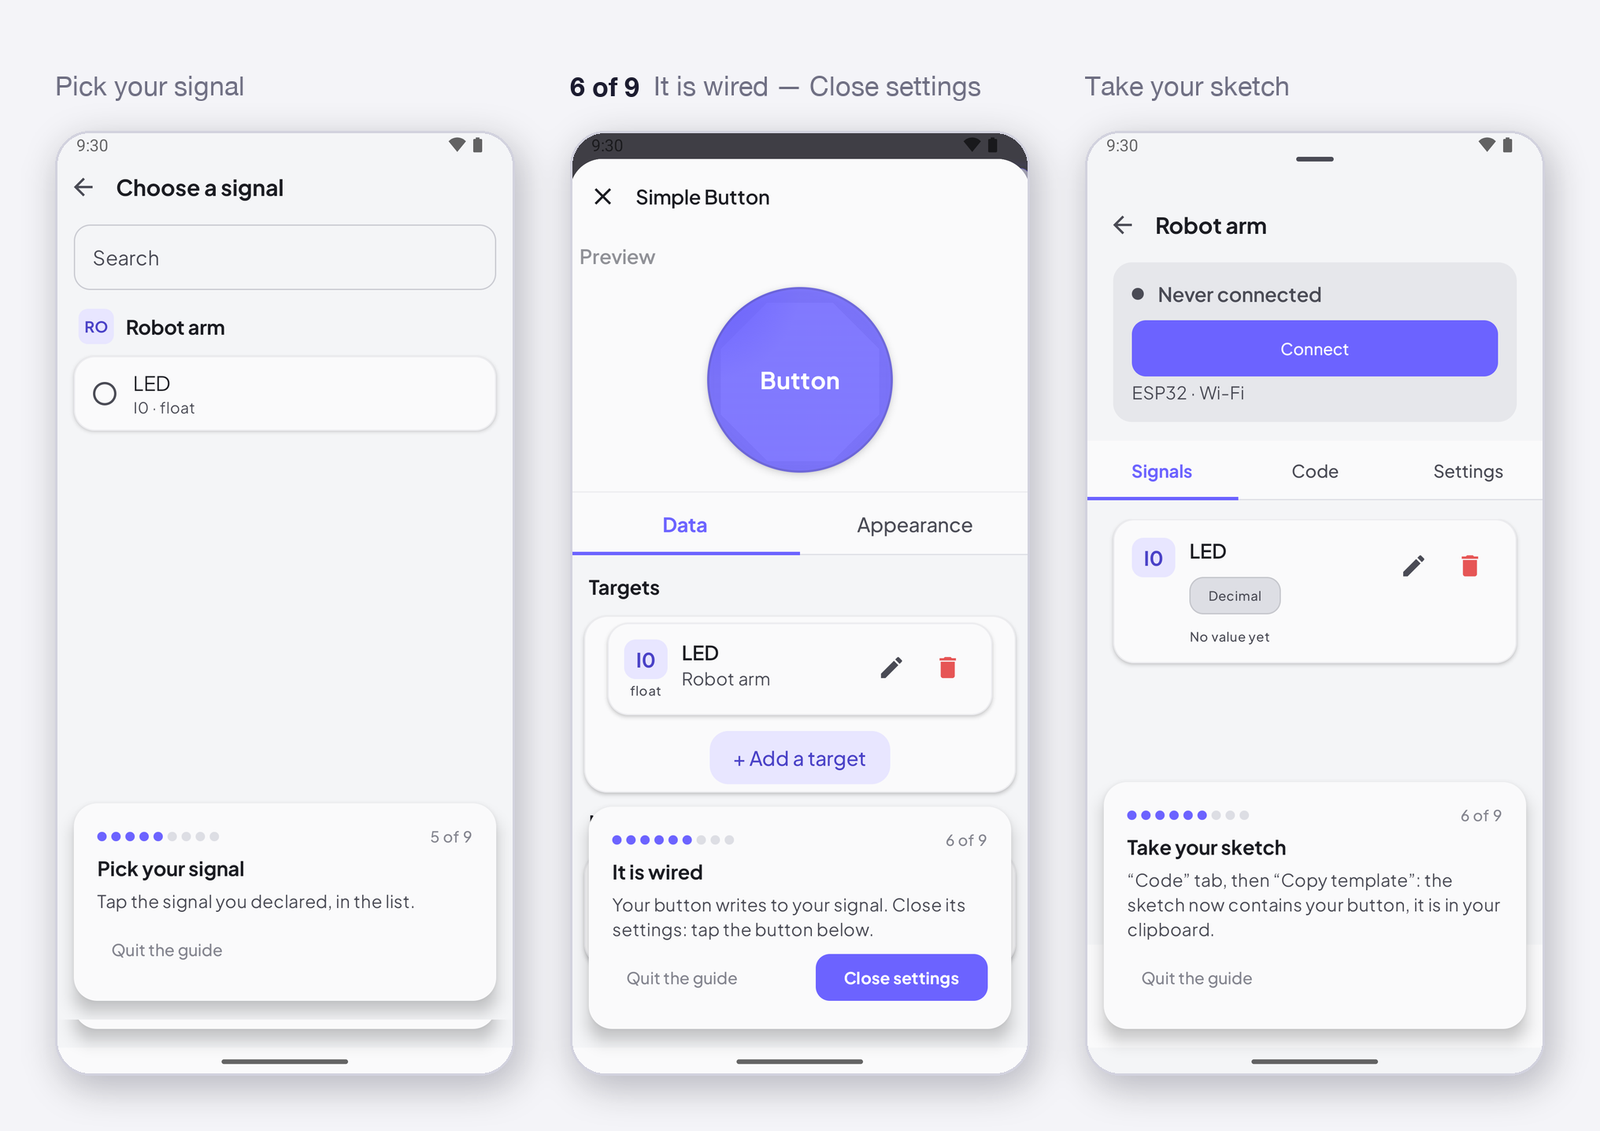
6 · It is wired; take your sketch
Back arrow, Close settings, Open my board: the guide waits on the Code tab. Copy the sketch — it contains your button, and the lines that make the device open its own Wi-Fi network:
const char* AP_SSID     = "MyESP32";    // the network your phone will see
const char* AP_PASSWORD = "12345678";   // 8 characters or more, or nothing starts

InstantIoT.begin(AccessPoint(AP_SSID, AP_PASSWORD));   // no token, no account: the phone is the far end

ISimpleButton(I0) {                     // empty, waiting for what a press does
    WHEN_PRESSED  { }
    WHEN_RELEASED { }
};
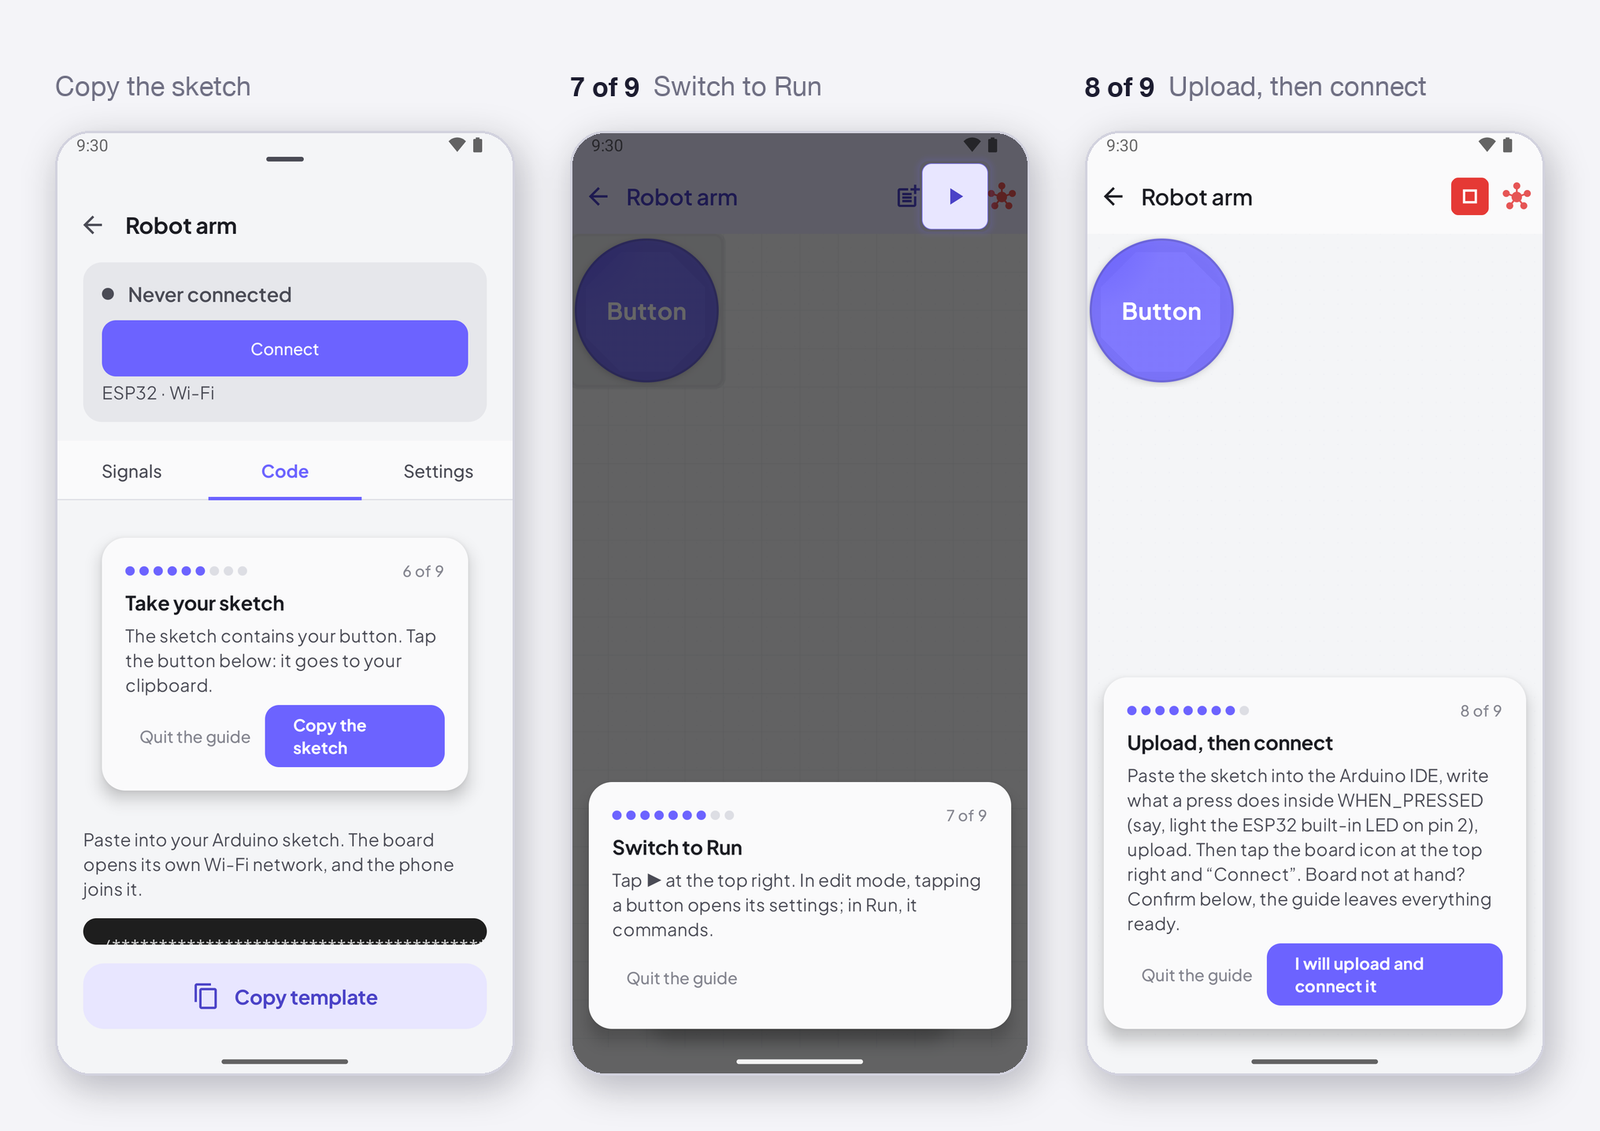
7 – 8 · Switch to Run, upload, then connect
▶ at the top right. Paste the sketch into the Arduino IDE, write what a press does inside WHEN_PRESSED (say, light the built-in LED on pin 2), upload. Tap I will upload and connect it — the guide leaves everything ready.
Your device now broadcasts a Wi-Fi network. Device icon → Settings → Open the connection (or Connect at the top of the sheet). Pick your device’s network in the list; the phone joins it, the icon turns green.
Over Bluetooth instead. Same Settings tab: set Connection to Bluetooth LE (ESP32 family), Bluetooth Classic (the original ESP32, Android only) or Bluetooth module (an HC-05 or HM-10 on two wires, any board), and take the sketch again from the Code tab — only its begin() line changed, plus an #include for BLE:
InstantIoT.begin(BLELink(BOARD_NAME));         // Bluetooth LE  — with #include <NimBLEDevice.h> above <InstantIoT.h>
InstantIoT.begin(BluetoothLink(BOARD_NAME));   // Bluetooth Classic
InstantIoT.begin(SerialLink(Serial1));         // a module on the hardware UART — SerialLink(RX_PIN, TX_PIN) on an UNO, a Nano, an ESP8266
Upload, then Open the connection: the device appears under its name; for Classic and for an HC-05, pair it in the phone’s Bluetooth settings first. The three roads, the wiring and the IDE settings they need are in Connect your device.
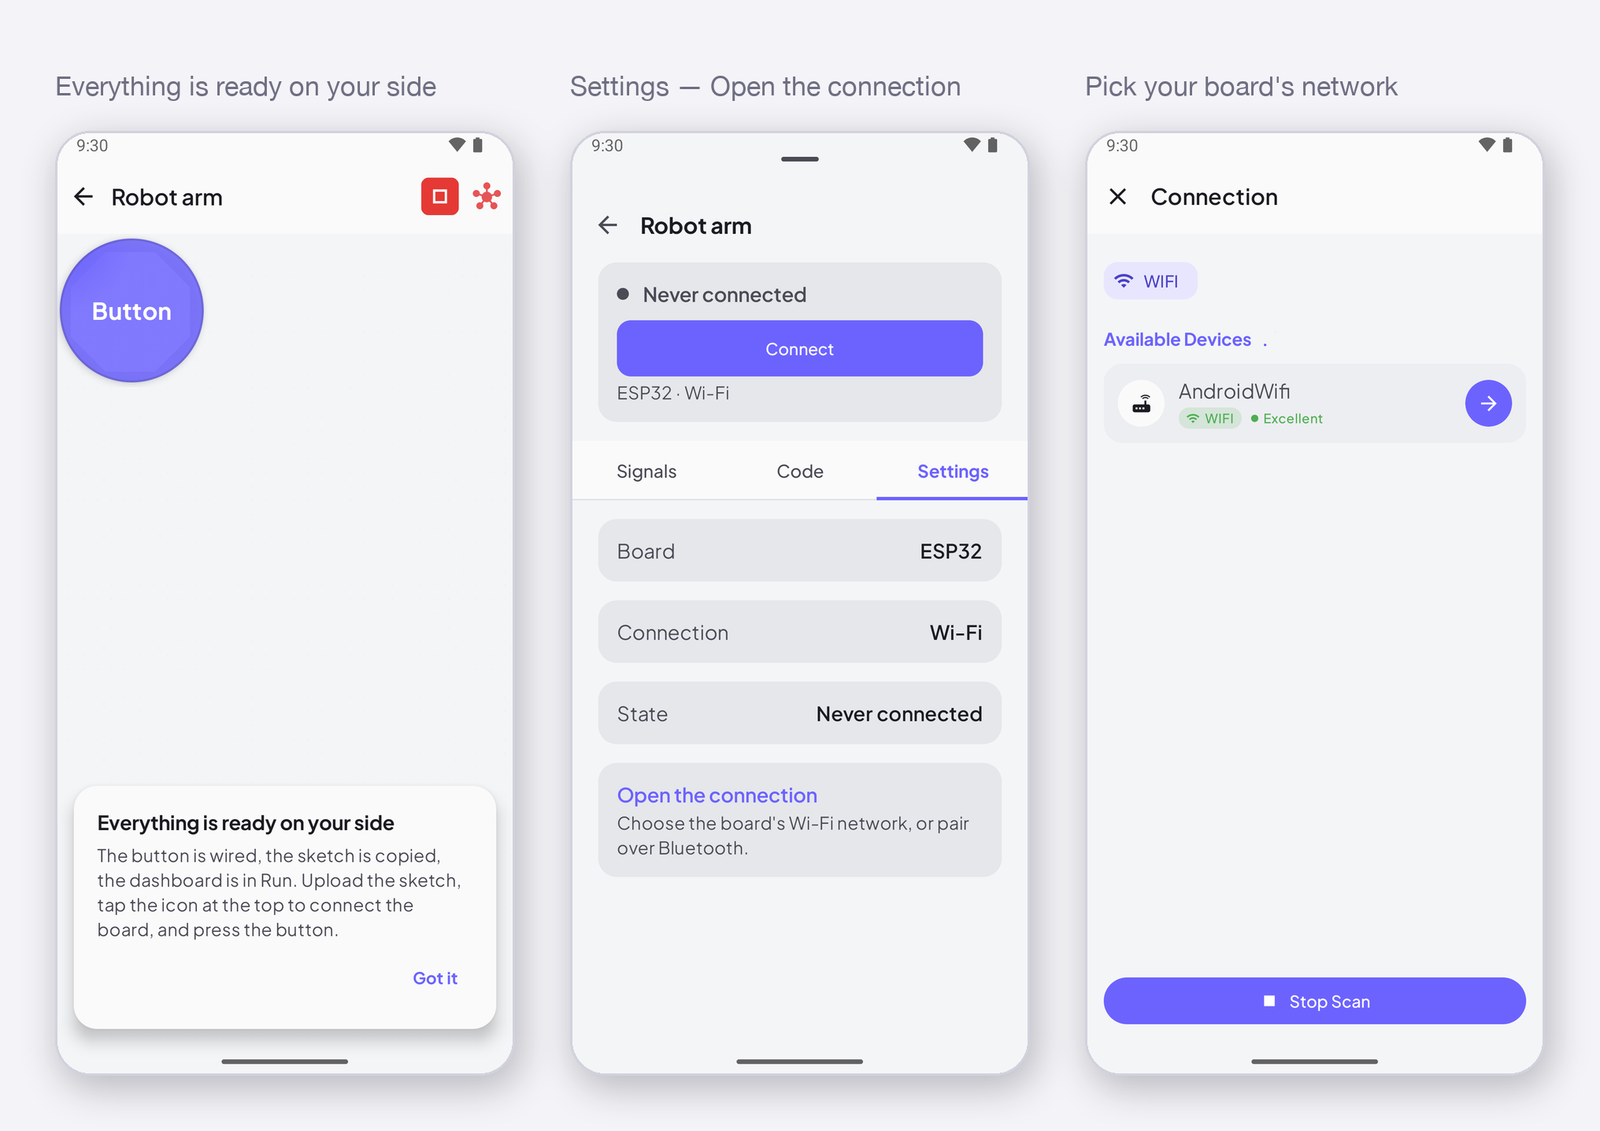
9 · Press the button
Press. The device receives 1 in the signal and the LED lights.
Your phone leaves the device’s network when it sleeps. Android and iOS drop a Wi-Fi network without Internet after a while. Reopen the connection from the device icon; the dashboard is unchanged.
The network never appears? Serial Monitor at 115200, with
#define INSTANTIOT_DEBUG 1above the#include: the device says whether it opened its network and whether the phone joined it —
[SoftAP] Creating: MyESP32
[SoftAP] Ready - IP: 192.168.4.1:8080
[SoftAP] Client connected
A password under 8 characters is the usual reason it never gets to Ready. On an ESP32 that restarts in a loop with Brownout detector was triggered, it is the USB cable: When it does not connect.
The complete sketch
What the Arduino IDE holds once you are done — the app wrote it, you added the LED. Over Bluetooth, only the begin() line differs: BLELink(BOARD_NAME), BluetoothLink(BOARD_NAME) or SerialLink(Serial1).
#include <InstantIoT.h>

const char* AP_SSID     = "MyESP32";              // the network the device opens
const char* AP_PASSWORD = "12345678";             // 8 characters or more

const int LED = 2;                                // the ESP32 built-in LED (LED_BUILTIN on most boards)

ISimpleButton(I0) {                               // the button at I0
    WHEN_PRESSED  { digitalWrite(LED, HIGH); }
    WHEN_RELEASED { digitalWrite(LED, LOW);  }
};

void setup() {
    Serial.begin(115200);
    pinMode(LED, OUTPUT);
    InstantIoT.begin(AccessPoint(AP_SSID, AP_PASSWORD));
}

void loop() {
    InstantIoT.loop();
}
When the project grows
Direct is the whole system in two pieces, and it stays that way as long as the phone is near. The day you want the history, the automations, the notifications, or to reach the device from elsewhere, move the project to Cloud: same widgets, same sketch, one begin() line to change. And the day you change boards — an UNO behind an HC-05, a Nano 33 IoT — the list is in Supported boards.