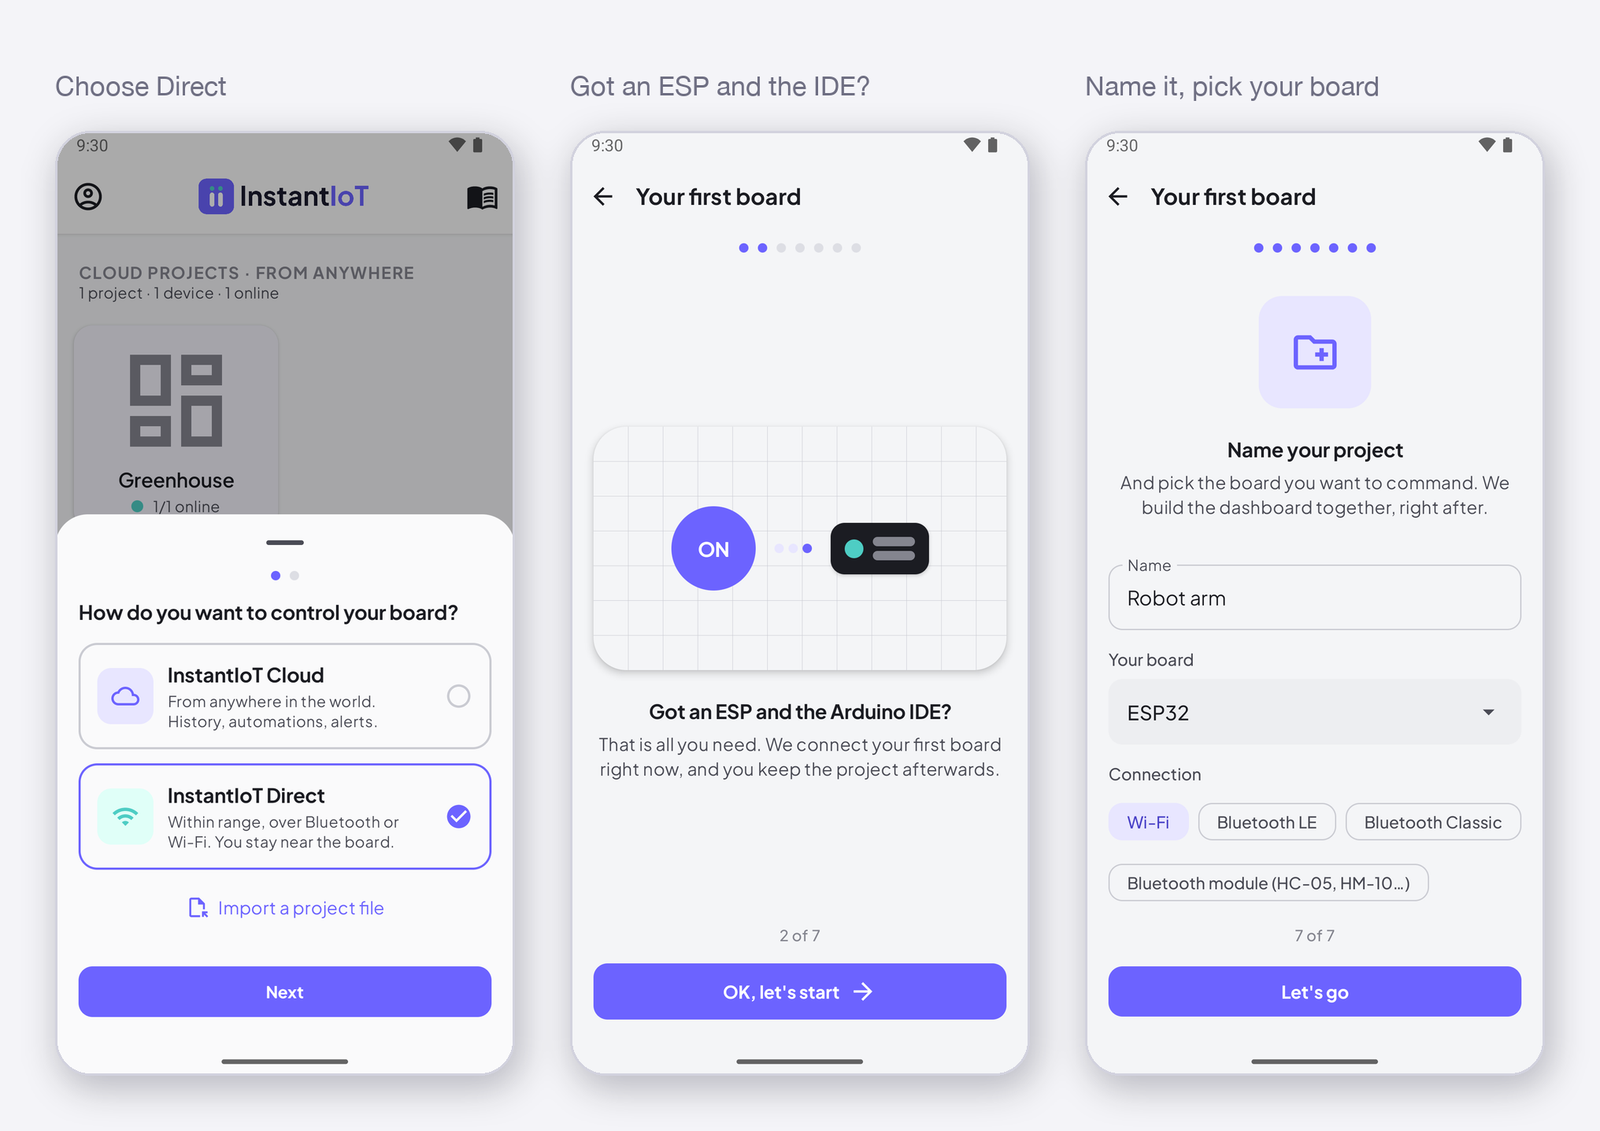
From an empty phone to a button that lights an LED on your desk — and it works the same from anywhere.
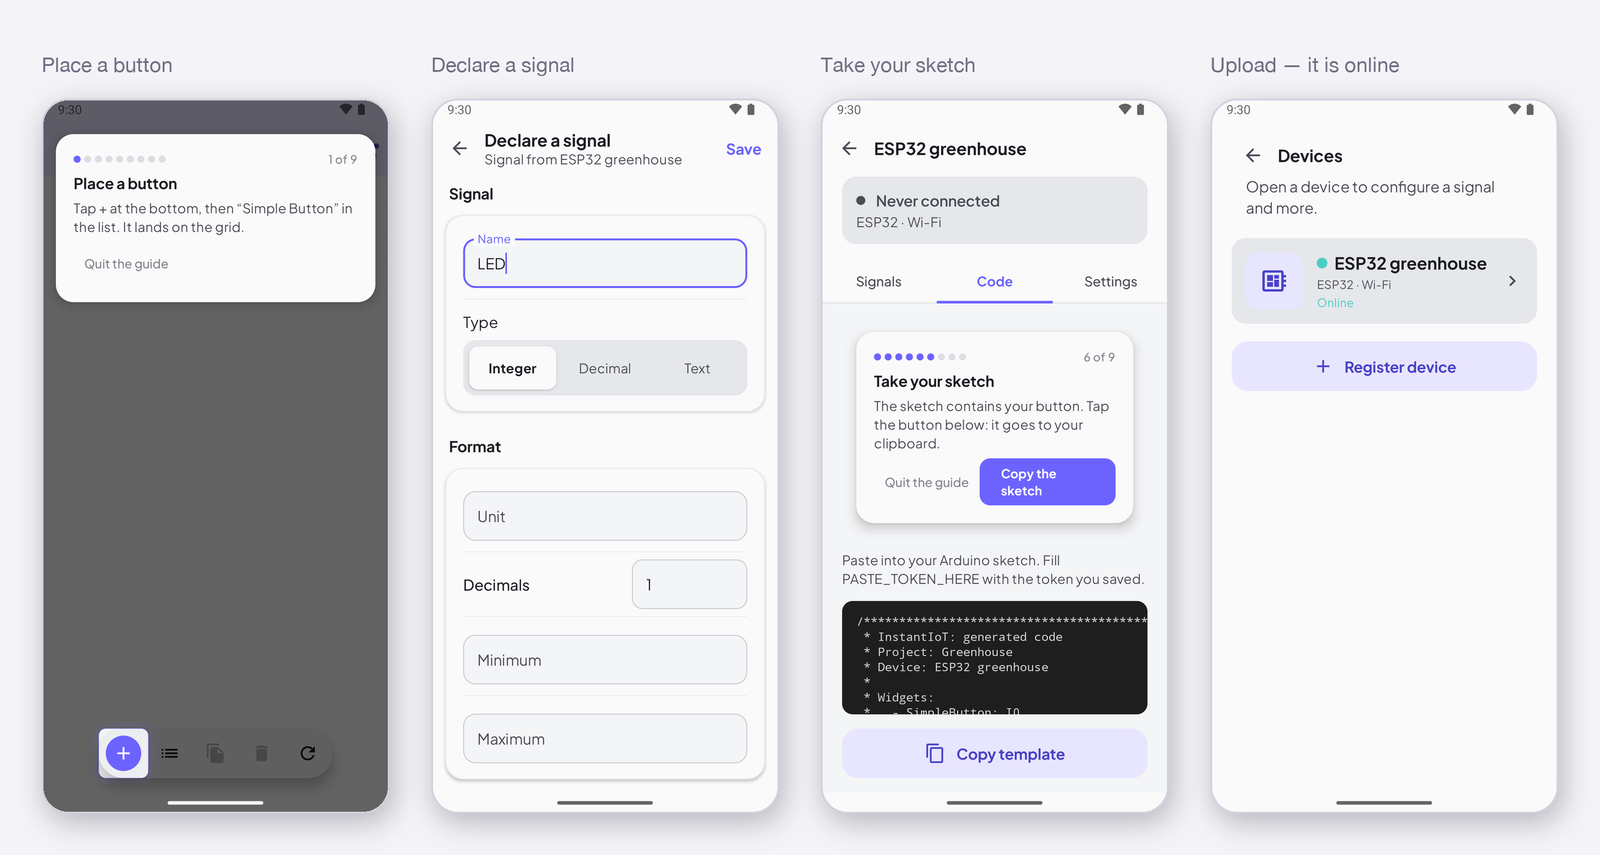
The app walks you through nine steps the first time. This page is that guide, with the screens, for reading ahead or catching up. The badges — 1 of 9, 2 of 9 — are the ones you will see on the phone.
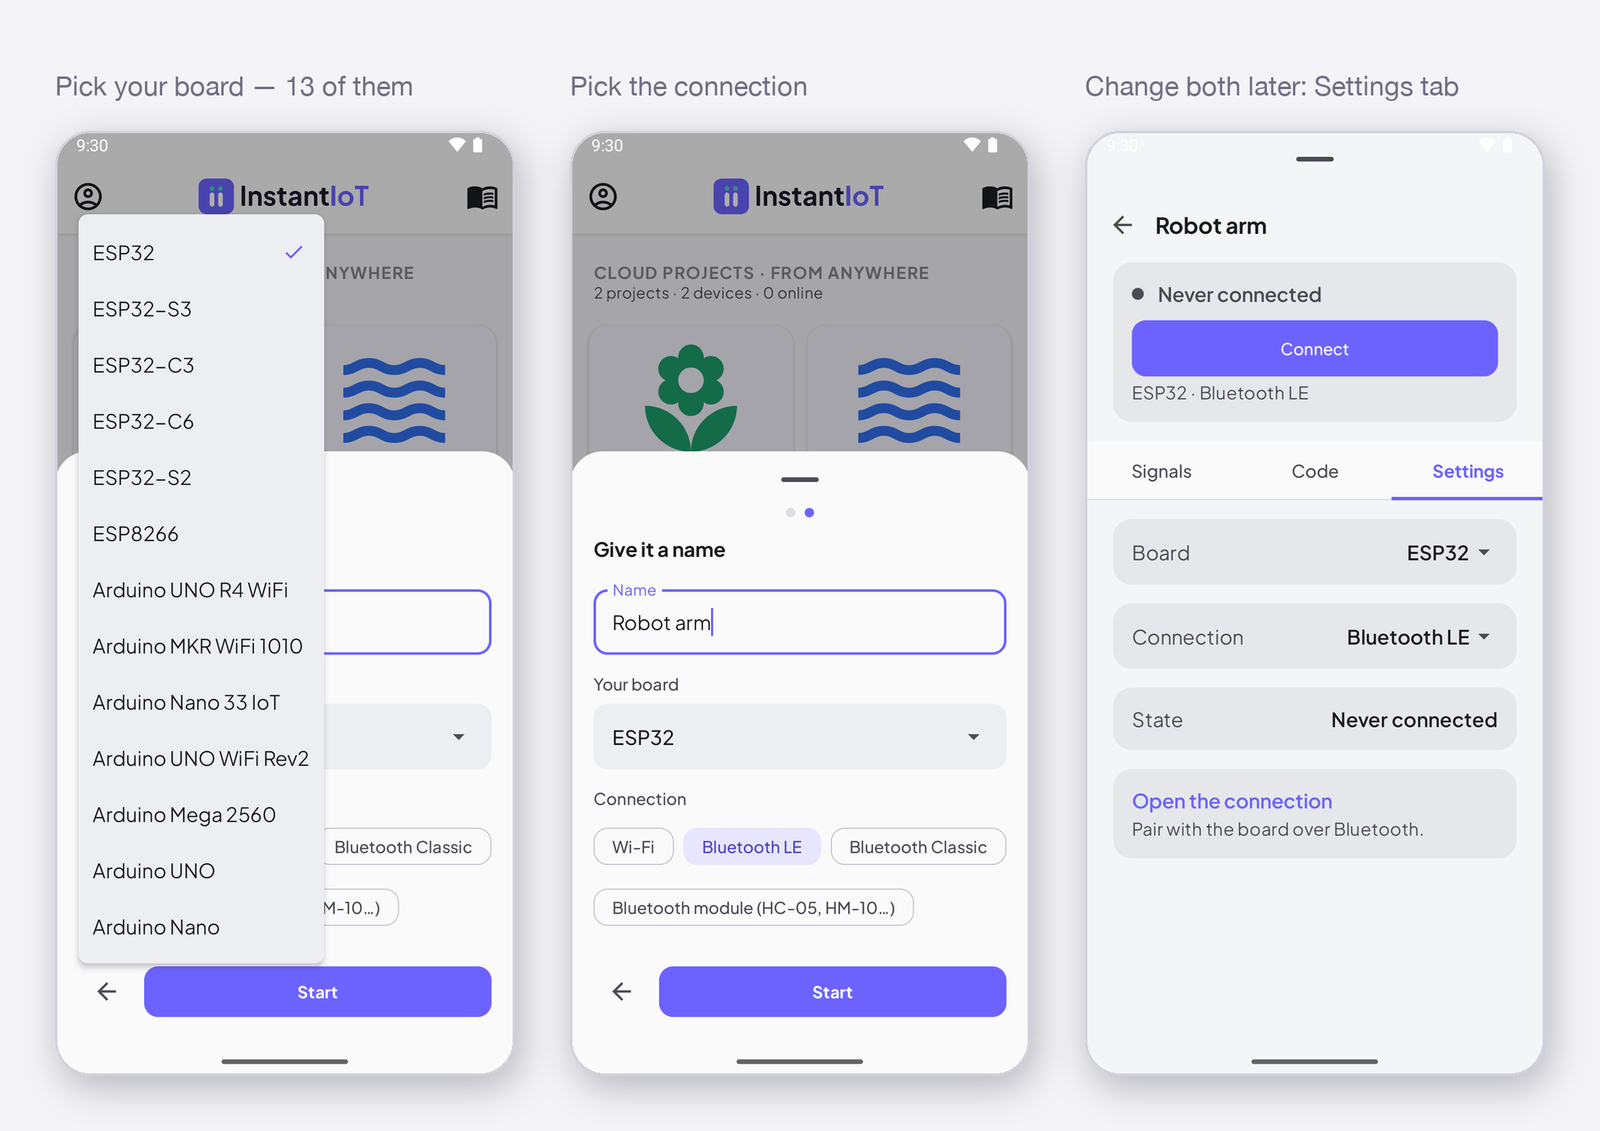
Before you start. You need the InstantIoT app, a board with Wi-Fi — an ESP32, an ESP8266, an Arduino UNO R4 WiFi, MKR WiFi 1010, Nano 33 IoT or UNO WiFi Rev2 (Supported boards) — the Arduino IDE with the InstantIoT library (Install the library), and your Wi-Fi name and password. Upload the Blink example once: if that works, everything below will.
Project and account
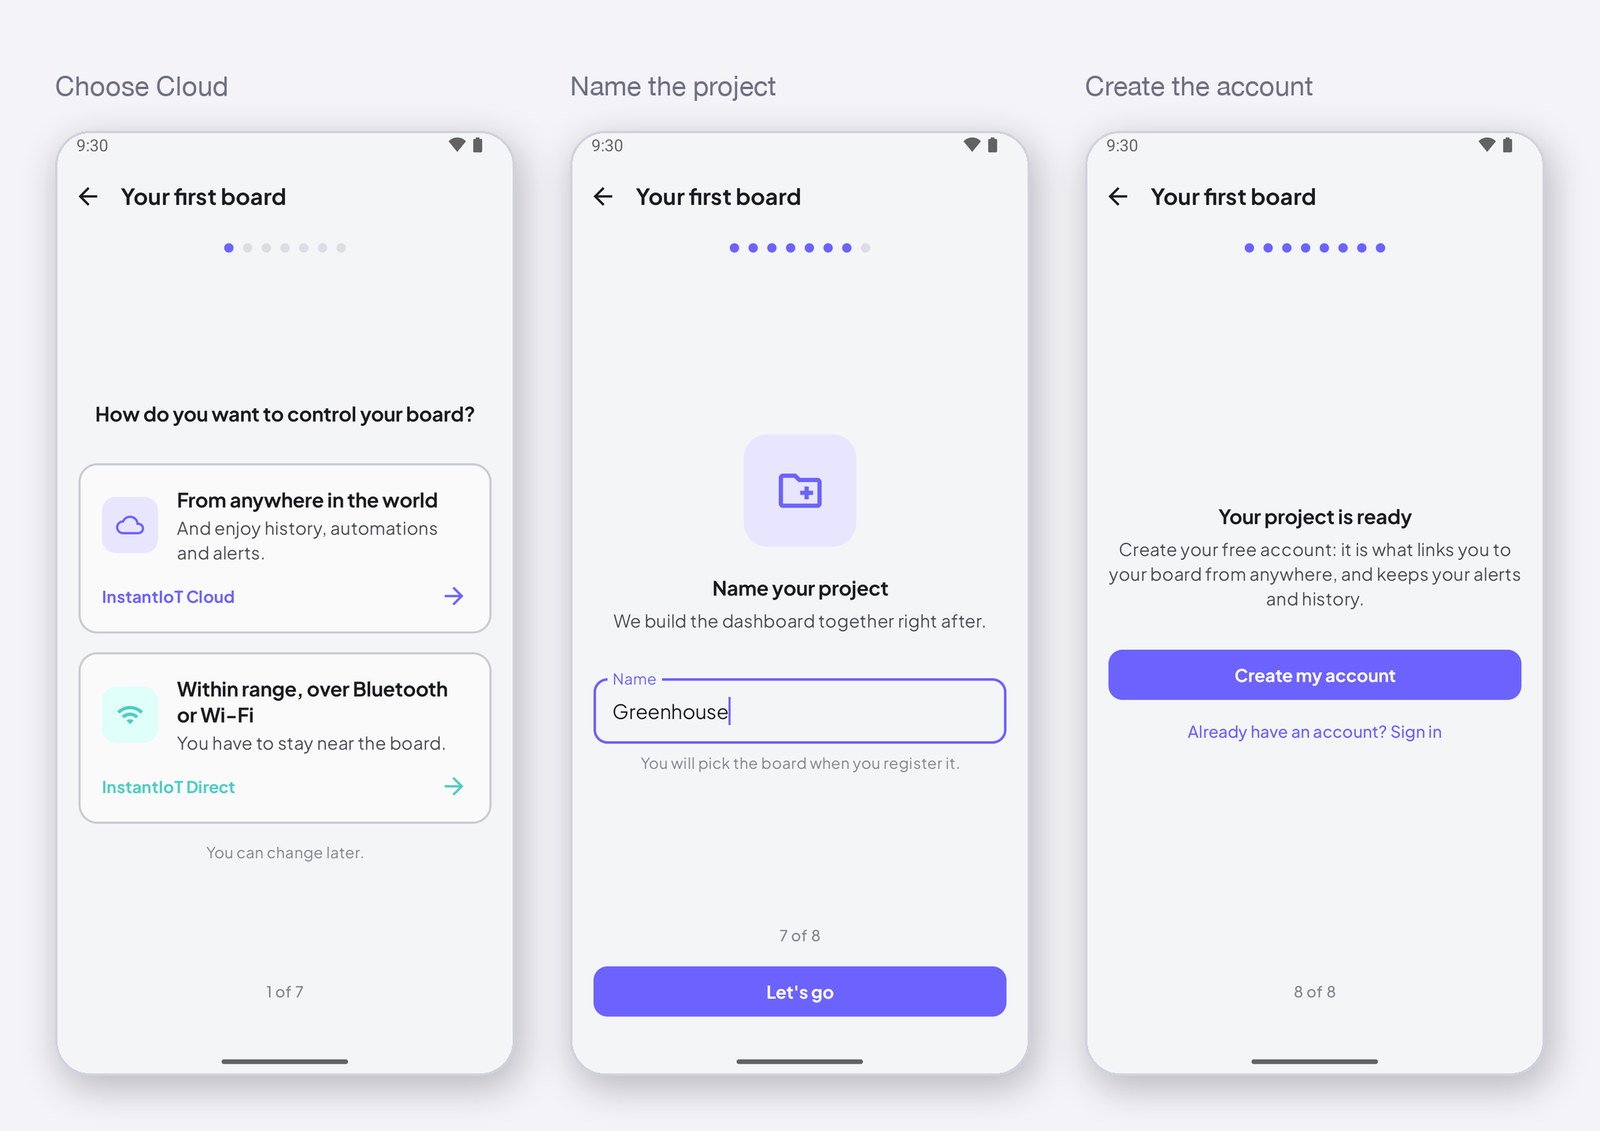
Tap +. On How do you want to control your device?, pick From anywhere in the world (InstantIoT Cloud). Name the project — Greenhouse, Weather station — then Let’s go. The account is what links the project to your device from anywhere: Create my account, e-mail and password, tap the link in the e-mail. The app signs you in by itself, and the guide starts.
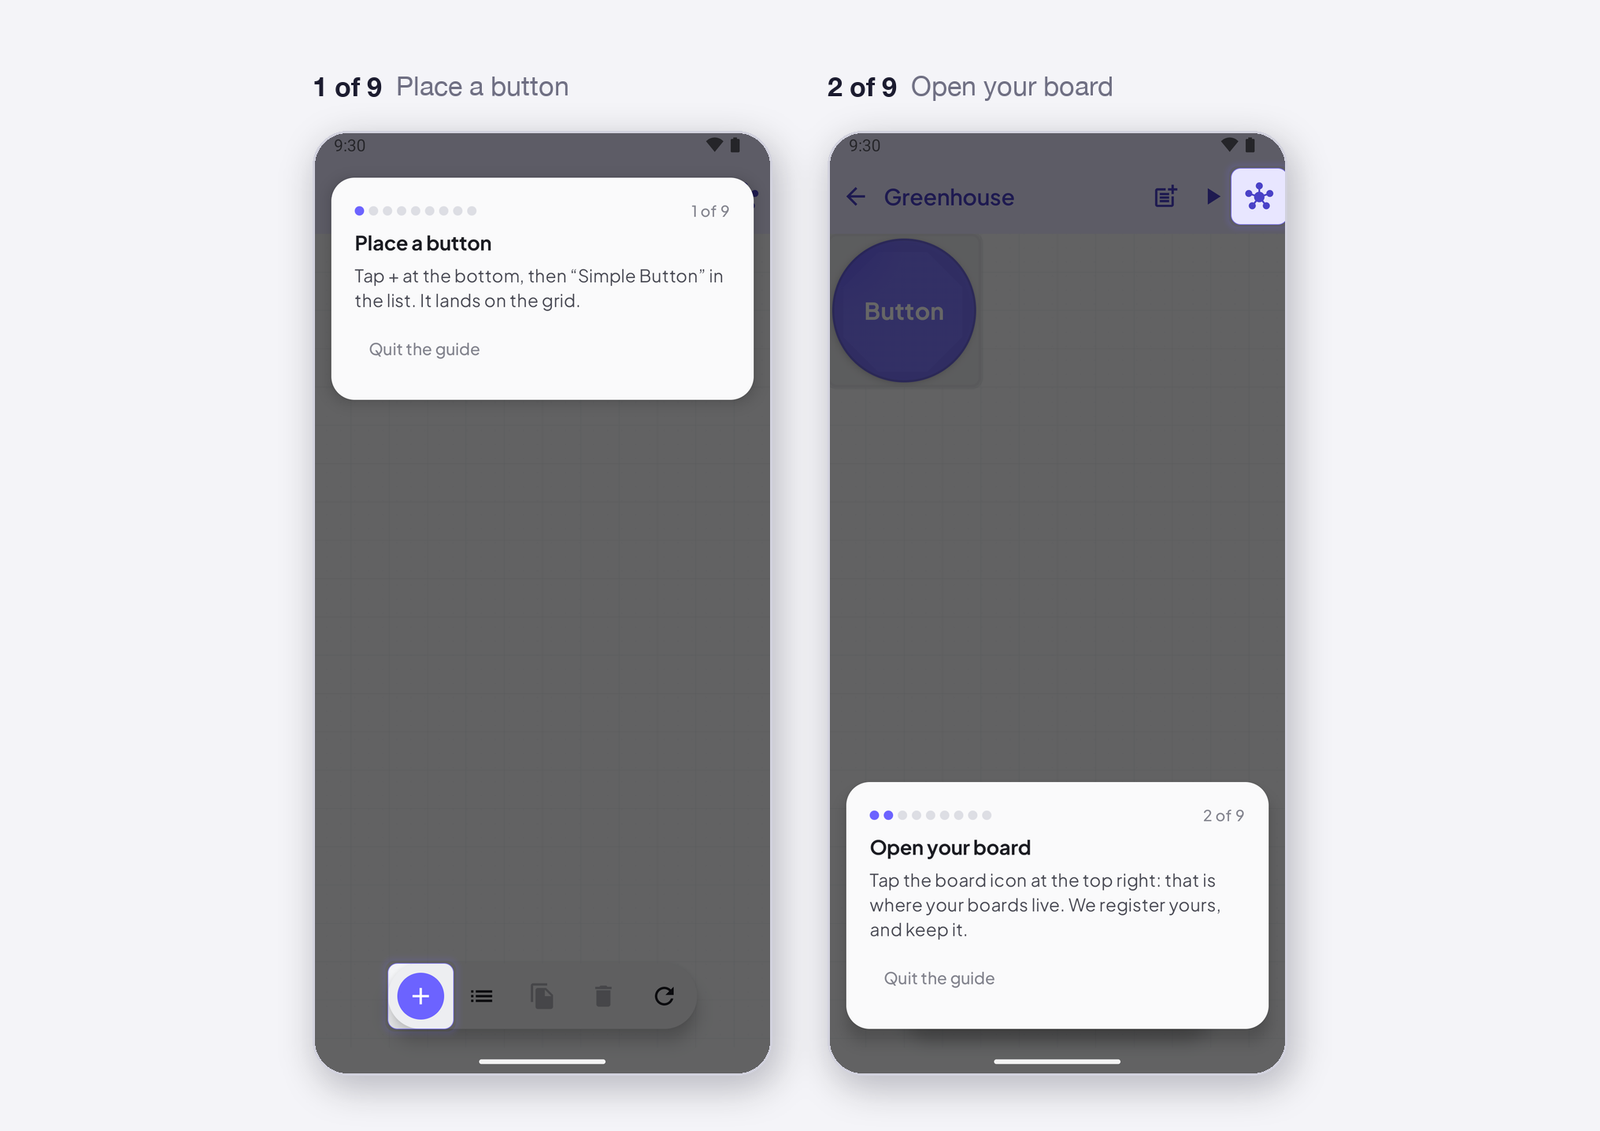
1 · Place a button, then open your device
+ at the bottom, then Simple Button: it lands on the grid. Then tap the device icon at the top right — that is where your devices live.
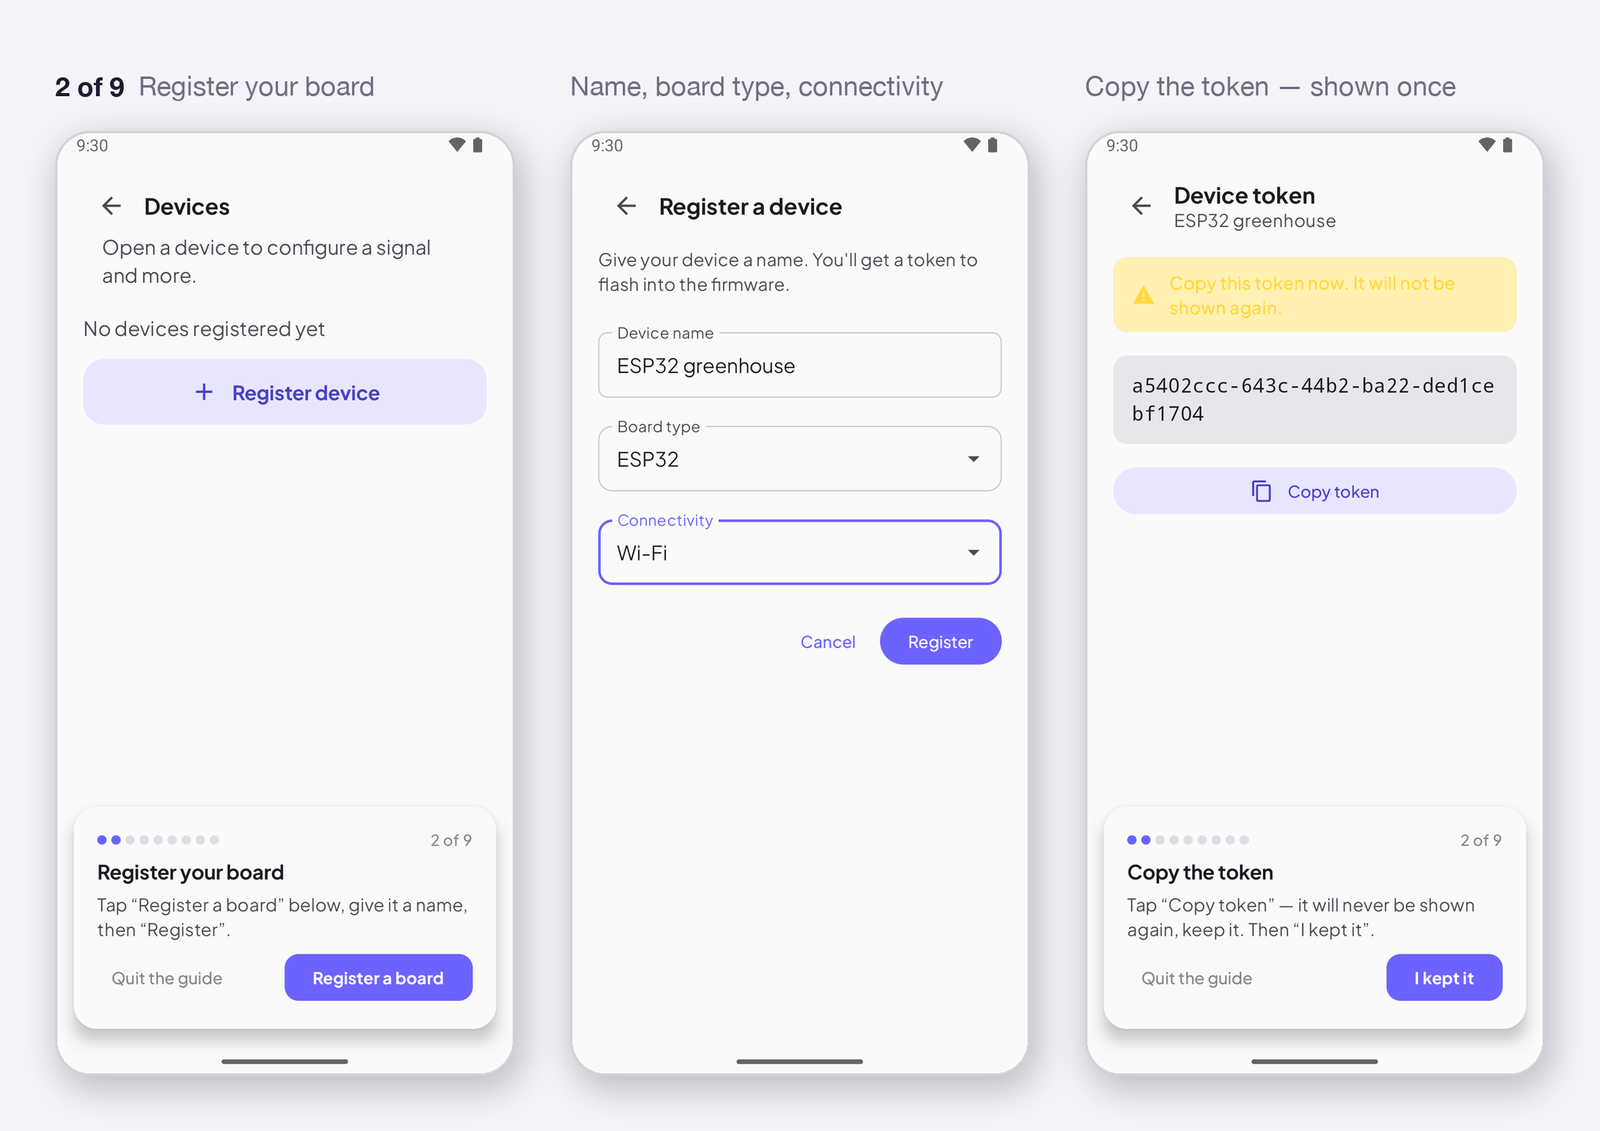
2 · Register the device, keep the token
Register a board: a name, the device type, how it connects (Wi-Fi), Register. The app shows the device’s token once. Copy token — it will never be shown again — then I kept it. It is the one line of the sketch that is yours alone:
const char* DEVICE_TOKEN = "b7e2…"; // what you just copied — never share it
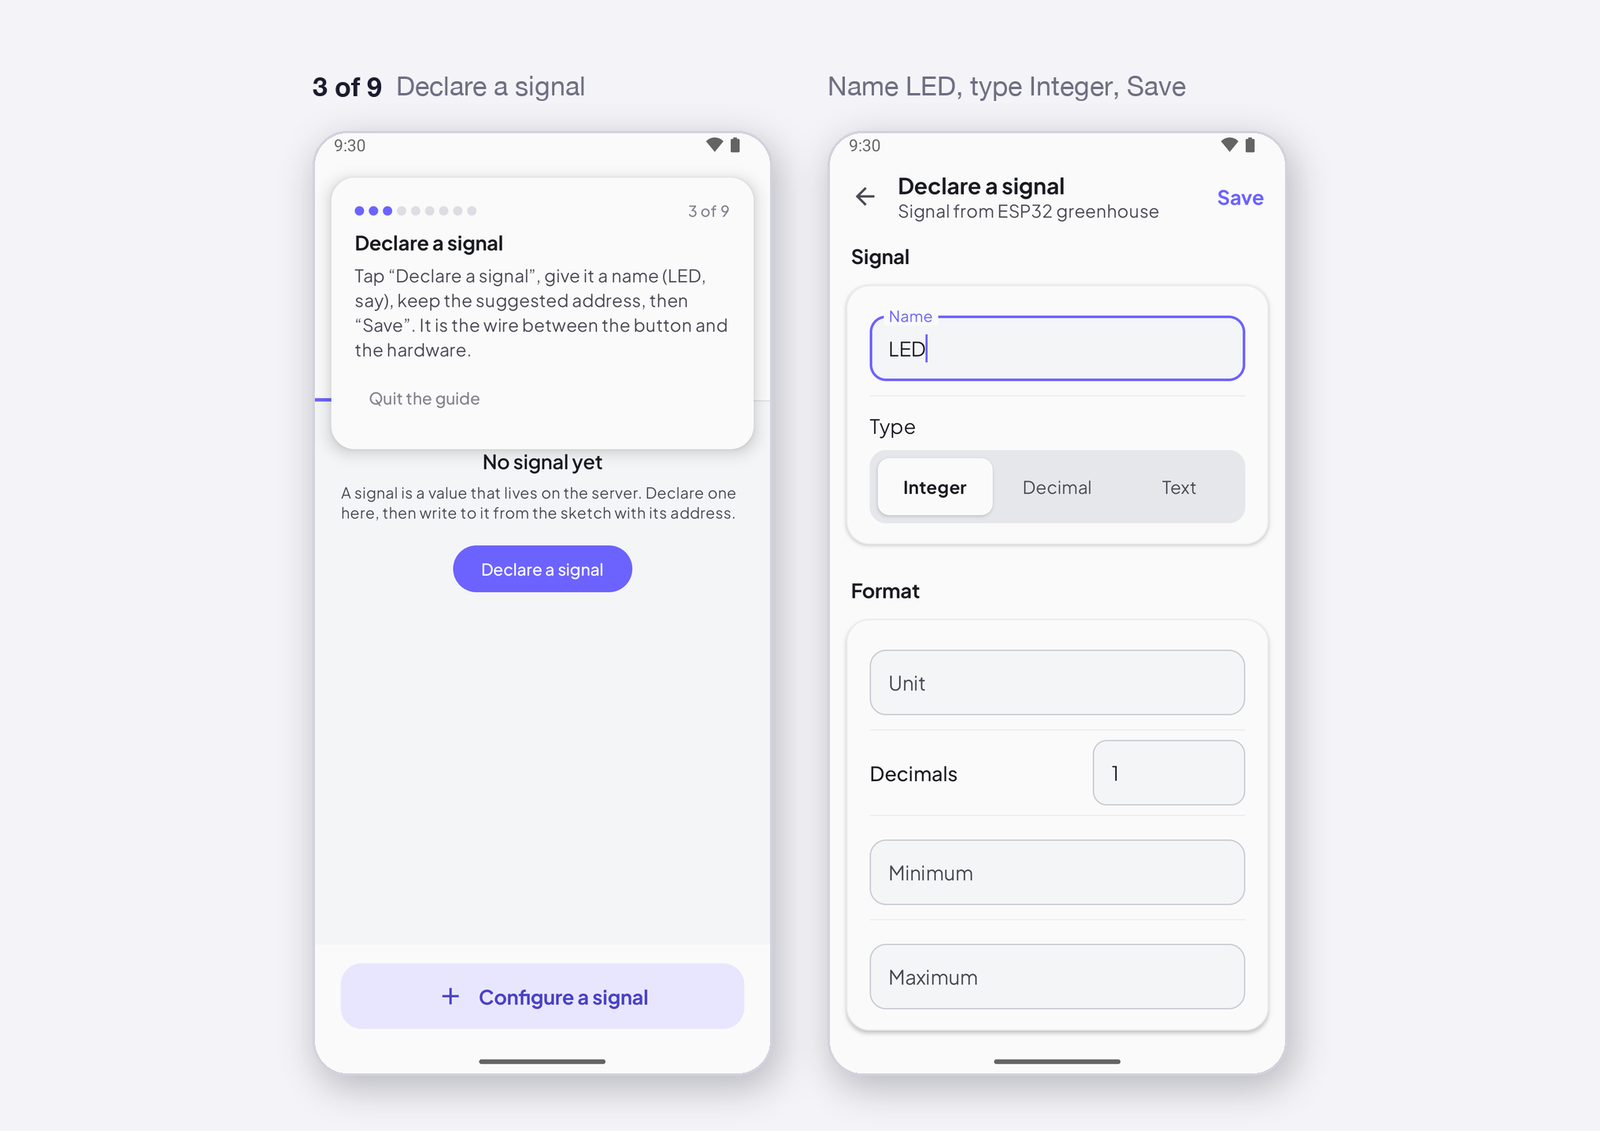
3 · Declare a signal
Declare a signal. Name it LED, keep Integer, Save. The app gives it the address I0. This signal is the wire between the button and the hardware — and the name the sketch will use:
ISimpleButton(I0) { ... }; // I0: the address the app just gave your signal
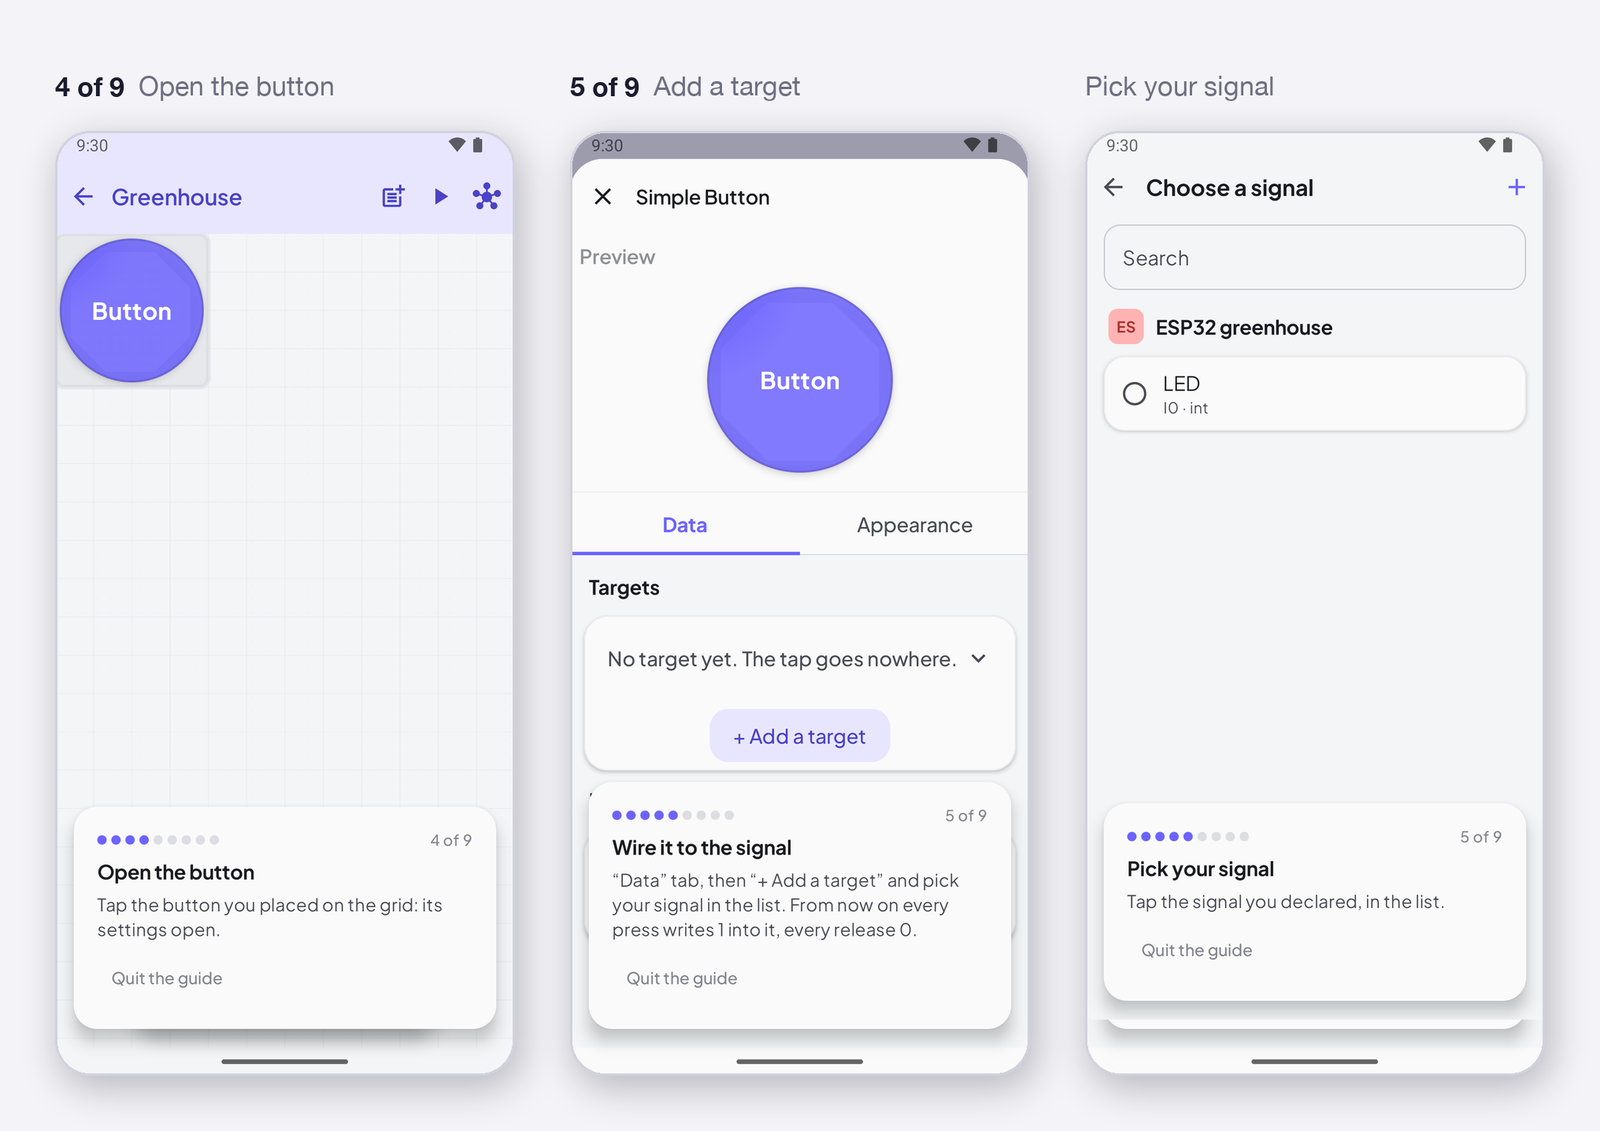
4 – 5 · Open the button, wire it to the signal
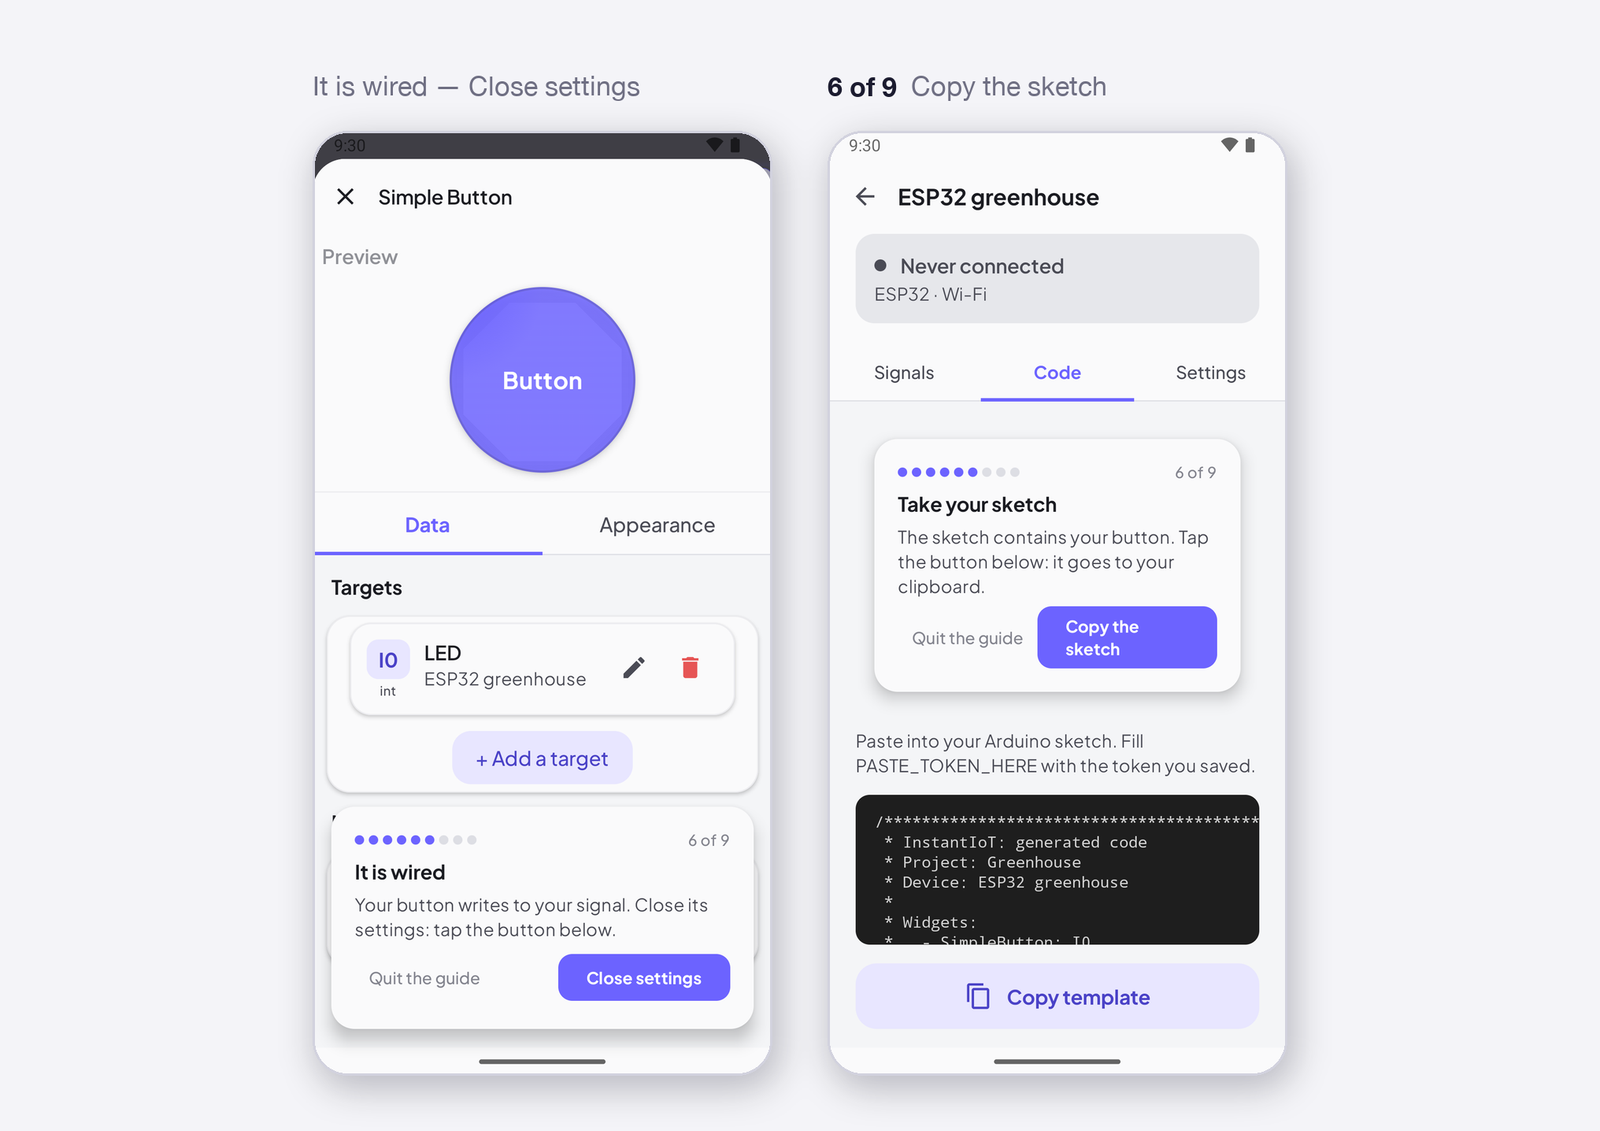
Back on the grid, tap the button: its settings open. Data tab, + Add a target, pick LED. From now on every press writes 1 into it, every release 0.
6 · Take your sketch
Back arrow, Close settings. The guide opens your device on the Code tab: Copy the sketch. It already contains your button and the token placeholder — the two lines that matter are written, the block is yours to fill:
InstantIoT.begin(WiFiLink(WIFI_SSID, WIFI_PASS), Cloud(DEVICE_TOKEN));   // the app wrote it

ISimpleButton(I0) {                   // and this — empty, waiting for what a press does
    WHEN_PRESSED  { }
    WHEN_RELEASED { }
};
7 – 8 · Switch to Run, upload, connect
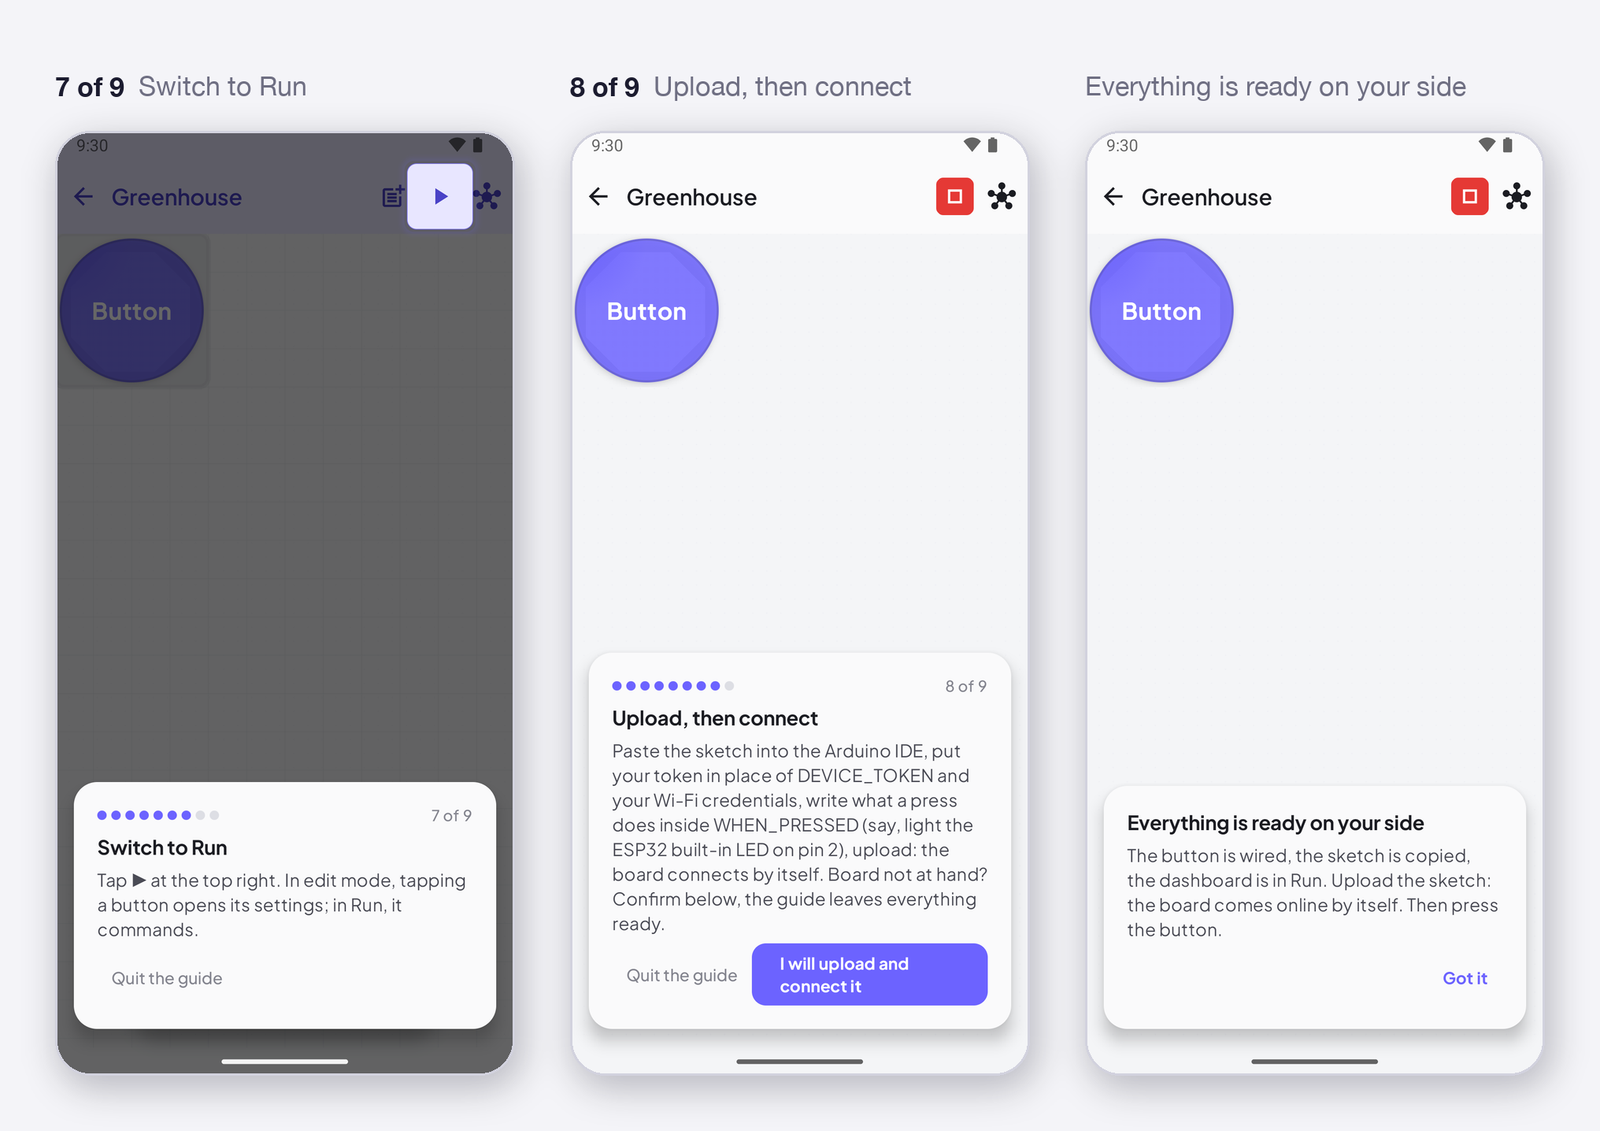
▶ at the top right: in edit mode a tap opens the settings, in Run it commands. Paste the sketch into the Arduino IDE, put your token in place of PASTE_TOKEN_HERE and your Wi-Fi credentials, and write what a press does:
ISimpleButton(I0) {
    WHEN_PRESSED  { digitalWrite(2, HIGH); }   // the ESP32 built-in LED
    WHEN_RELEASED { digitalWrite(2, LOW);  }
};
Upload. The device connects by itself. Tap I will upload and connect it — the guide leaves everything ready on your side.
9 · Press the button
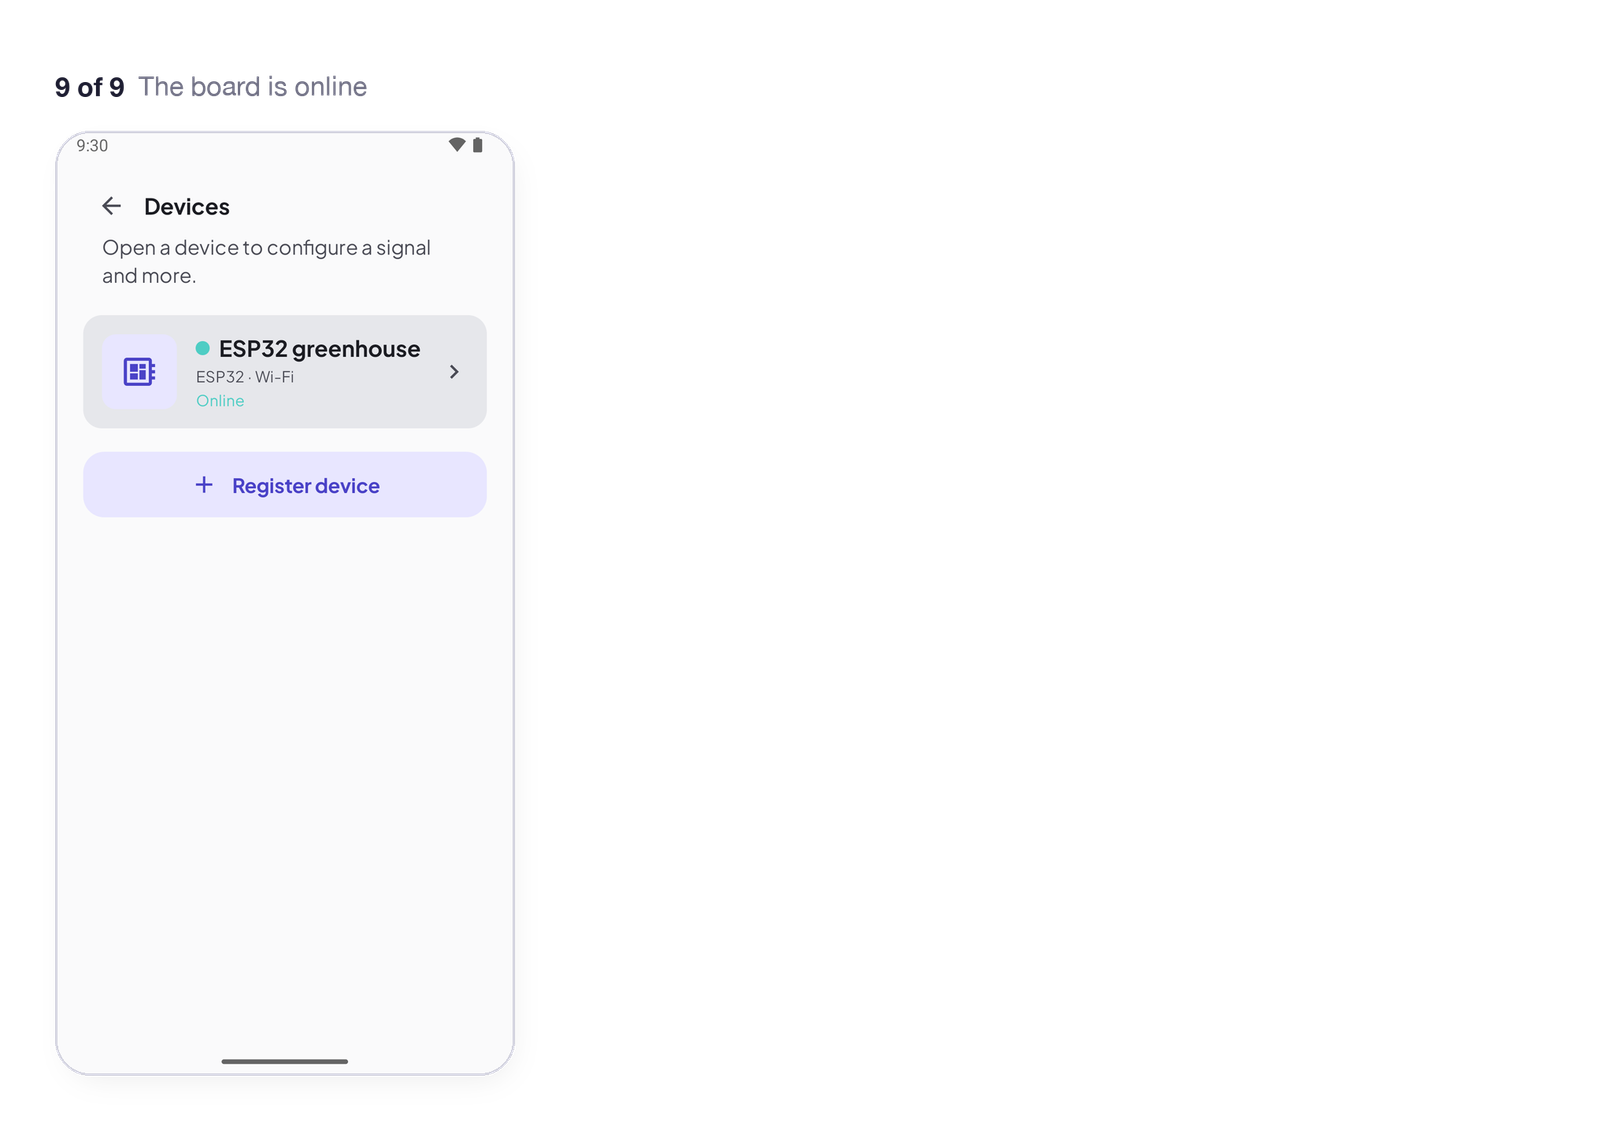
When the device is online, its dot turns green in the device list. Press your button: the device receives 1 and the LED lights.
The device stays grey? Open the Serial Monitor at 115200: the library says what it is doing — Wi-Fi joined or not, token accepted or refused. Nine times out of ten it is the Wi-Fi password or a token pasted with a space. Add
#define INSTANTIOT_DEBUG 1above the#includeto see every step:
[WiFiSecure] WiFi connecting to: MyWiFi
[WiFiSecure] WiFi OK - IP: 192.168.1.57
[WiFiSecure] TLS connecting: instantiot.cloud:9443
[WiFiSecure] Handshake sent (TLS), heartbeat=5000
The complete sketch
What the Arduino IDE holds once you are done — the app wrote it, you added the LED:
#include <InstantIoT.h>

const char* WIFI_SSID    = "MyWiFi";
const char* WIFI_PASS    = "MyPassword";
const char* DEVICE_TOKEN = "PASTE_TOKEN_HERE";   // app → device → Copy token

const int LED = 2;                                // the ESP32 built-in LED (LED_BUILTIN on most boards)

ISimpleButton(I0) {                               // the button at I0
    WHEN_PRESSED  { digitalWrite(LED, HIGH); }
    WHEN_RELEASED { digitalWrite(LED, LOW);  }
};

void setup() {
    Serial.begin(115200);
    pinMode(LED, OUTPUT);
    InstantIoT.begin(WiFiLink(WIFI_SSID, WIFI_PASS), Cloud(DEVICE_TOKEN));
}

void loop() {
    InstantIoT.loop();
}
Your device is wired. Everything else works the same way — three short pages: See a sensor on your phone, Control your device from your phone, Get notified.